Monday, June 30, 2014

Weekly update 6/22 & 6/29 - Weeds and Rain

It has been raining for weeks now.  Just about every day between Father's Day and Sunday, June 22 it rained.  Not just a nice shower, a sweeping, heavy rain and wind storm that soaked the ground.  When I went to the garden to weed and harvest everything was so wet that even walking on the paths was a sloppy slippery mess. If you pulled a weed you got large clumps of soil along with it.  There was no possibility of weeding without severely damaging the garden, compressing the soil, and making a mess. So we put away the tools and went home.
taken 6-21-14

I remember when this happened in 1993 and caused the Mississippi River to flood so I am hoping we get a reprieve from the continuing rain soon, but it is not looking that great.

you can see lots of weeds, but not too big yet (6-21-14)

It wasn't until Friday June 27 that I was finally able to get into the garden.  It did not rain on Thursday at all and Wednesday it rained only in the morning, so by Friday I thought I might have a chance to attack the weeds that were quickly taking over. Now with another week of growth, some weeds were bigger than the plants they surrounded.
You cannot even see the basil planted between the tomatoes
Friday was hot and humid.  I worked for two hours or so and got about 1/3 of the garden weeded.  By the end I was a hot, sweaty mess that took two showers to make human again.  Granted I did the hardest parts first because, well I know myself, if I have to come back and the hardest part is left, I will throw up my hands in despair and run away, however if I return and see an easier task I will knuckle down and get to work.
around the weeded beans 6-27-14

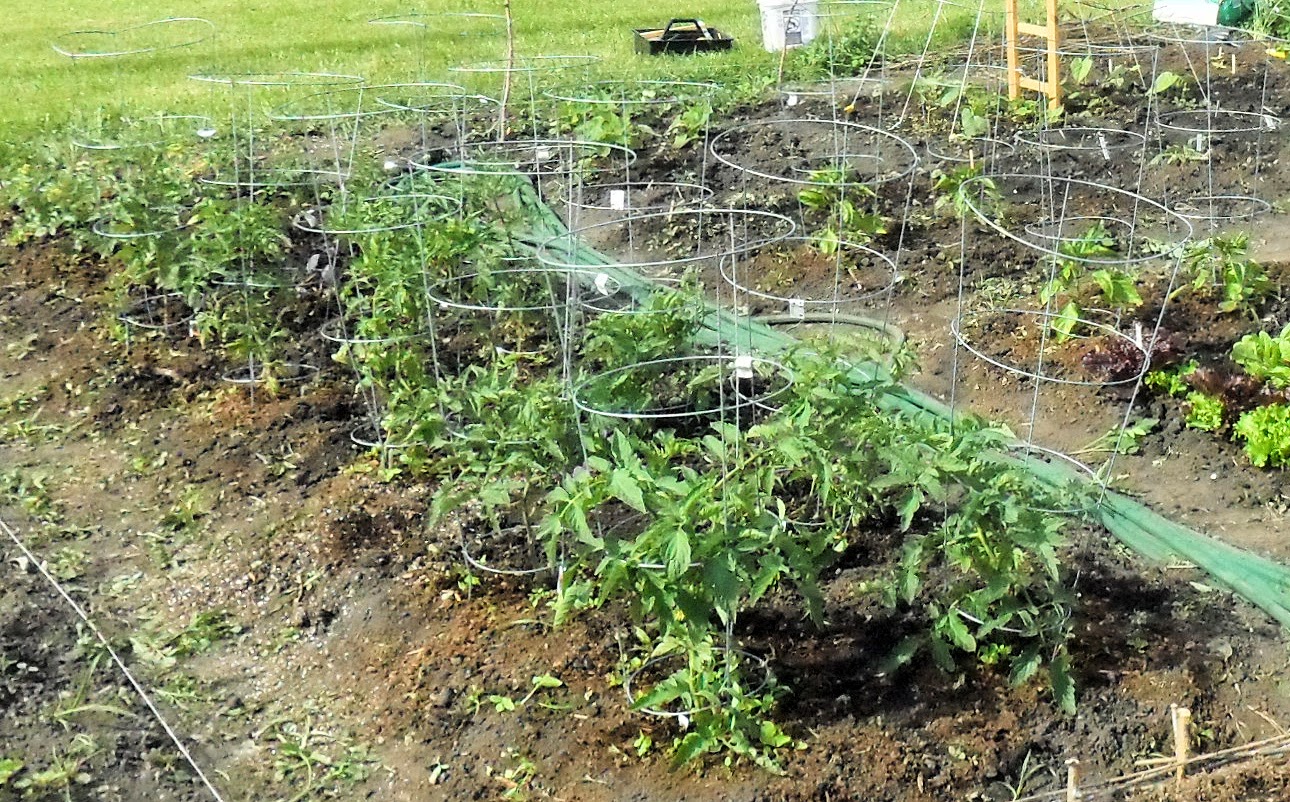
Friday night, the hubby came back with me to the garden around 7 PM and we worked for another hour and tackled most of the weeds.  The garden looks much better now and I think that we got most of them before they produced seed.
Will not weed the herb garden until next week, but everything else is well weeded now.

Keys to Tackling a Weed Population:

Weeds are opportunistic plants, popping up wherever conditions allow. Even if you embrace a more casual attitude toward weeds, you'll want to control their growth by focusing on prevention as well as eradication. With that in mind, think about all the things that you do to stimulate plant growth. Now, to suppress weeds, do the opposite. 

1. Yank them young
Your first defense against weeds is to pull or hoe them before they get established. Learn to identify weeds as young seedlings and nab them as they emerge. 

2. Stop the seed
If you don't get them as babies, at least don't let them go to seed. As the old gardening saw goes, "One year's seeding makes seven years' weeding."

3 . Mulch
Organic mulches include compost, shredded leaves, wood chips, bark, dried grass clippings, and other biodegradable material. A 2- to 3-inch layer will keep sunlight from reaching the weed seeds, preventing their germination. Apply mulch immediately after weeding or digging your soil. Take care to keep mulch an inch or two away from plant stems to prevent rot caused by moisture retained in the mulch. Your mulch material will also conserve water, keep roots cool, and nourish the soil as it decomposes. 
Another gardener put grass clippings over the entire plot then planted through them.

4. Plant densely
Grow plants close together, and they will consume the available space, nutrients, and sunlight, thereby bullying the weeds out of the way.  This works really well for herbs.  But even my husband commented once the tomatoes get a bit bigger they will starve out most of the weeds around them.


tightly planted lettuce crops

5. Pull, Dig and Hoe
Remember not to yank perennial weeds. You'll break off the root, and another weed will appear. Use a long screwdriver or weed-pulling tool with a forked end. Hand-pulling becomes easier as your soil improves.  For larger weeds, you may want to use a shovel to get all the root and runners.  And using a pointed hoe, diamond shaped, give you the ability to scrape off shallow root weeds and dig out a pesky established weed.

6. Cover
Some gardeners use plastic sheeting, newspaper, and weed-barrier cloth (sometimes called landscape cloth) as mulchlike covers. This is very popular in the Community Garden.  Probably among people who do not have the time to stop by the garden everyday to yank the young weeds.  If this is you, just play the material over your planting areas and cut holes for your plants to grow through. Dark fabric will block out light and smother young weeds.  
Another garden in the community patch using landscape cloth

Sunday, June 22, 2014

Making Salad from the Garden

So far we do not have any fresh tomatoes so I had to get them from the farmers market, but the plants have flowered and the pollinators are out so it is just a mater of time.  However the salad greens and the peppers were available so I harvested that.

salad greens
I collected butter crunch lettuce, sorrel, mustard greens, and micro greens.  We washed and drained them , then tore them by hand into a bowl.  (Please remember my camera is broken, so I cannot turn on the flash, making indoor picture difficult.)


We added tomatoes, green onions and carrots from the farmer's market and gathered fresh herbs from the garden to made an herbal dressing to go on top.

Creamy Herb Dressing
1 cup extra virgin olive oil
1/2 cup buttermilk
1/4 cup fresh parsley, minced
1/4 cup fresh basil, minced
3 tablespoons herb vinegar (any combo of herbs is good)
2 tablespoons water
2 tablespoons fresh thyme, minced
1 tablespoon fresh chives, minced
1 tablespoon complementary herbed honey (plain honey is fine too!)
1 green onion, thinly sliced
1 teaspoon Dijon mustard


Combine all ingredients in a blender and process until smooth. For a more emulsified dressing, blend all ingredients except oil, then slowly drizzle in the oil with the blender running. Cover and chill for several hours before using to allow flavors to blend.  Cover tightly and store in the refrigerator.


Saturday, June 21, 2014

Weekly Update - Community Patch 6-15-2014

This week I was ill and it rained every day, so i did not even visit the garden between 6-8-14 and 6-15-14.  That morning my hubby and i went out to make sure everything was watered as it did not rain on Saturday.


The one thing you can tell from the garden is that I was not here once this week.  The weeds are taking over.  We spent about an hour weeding with a hoe.  I did not have much energy so the weeding was haphazard at best and I will need to get in here next week to catch up.  I am hoping to feel better in coming days.

Last week i mentioned that my neighbor was new and that she had a lot of catch up to do as the weeds were rampant in her patch.  Well in my absence this week, she cleared out all the weeds from her patch.  It is an amazing sight isn't it?

I expect she will be planting it this week, although there are a number of tomato and other plants along the back edge.

There was great growth and many plants are producing fruit!
Here is a cucumber on the bush cucumber plant.


 A nice pepper on the Lady Belle Pepper plants.  There were actually two of them and we harvested and sampled them.  Wonderfully sweet!


The greens were exploding and not as hurt by the heat as I expected them to be.  The Giant Red Mustard (center) is going to seed, but I am okay with that as I want to harvest the seed and use it.  The leaves of this are bitter, yet not so pungent as to be off putting, tossed in with romaine and bib lettuce they are a great counter point.  The red stem sorrel (to the right) is also very flavorful.. I enjoy this in salads and will try cooking it as a wilted vegetable in the next few weeks.  The arugula (to the left of the mustard) has been ravaged by bugs.
Obviously it is preferred, because the plants next to it on both sides do not have this extensive damage to the leaves.  I cut some often, but I never eat it because the bug damage makes them useless.  I never see the bugs making the damage though so I do not know what treatment is wise.  they are also getting ready to go to seed, so I think I will just leave them as a bug magnet to keep pest off the other greens.


The micro greens I have harvested regularly and will save the remaining seed  for fall when the temps cool back down to grow another crop.  The collared greens are just getting to the mature size needed to harvest.  perhaps another week.

This is after watering and weeding.  You can see I cut down on the weed population, but I think they are still winning.  I added three more rows of string to the pea fence because they had outgrown the  rows I stung last weekend.  Hubby felt my stick frame was not sturdy enough for the peas so he reinforced it with pine stakes.  He also staked the grape and cherry tomato plants.


The herbs are getting bushy and will be ready for a first harvest this coming week.  I have already dried the thyme I harvested a couple weeks ago and plan to cut fresh herbs from the garden for a program I am doing called Be an Herbal Gourmet at the Lisle Public Library on June 17th..

Wednesday, June 11, 2014

Garden Architecture - making trellis for vegetables

Making growing spaces for your plants not only helps them produce more, it is also aesthetically pleasing and gives the garden texture and a focal point.  Now I did not design my Community Patch to be a show place.  I am more interested in production, but that does not mean I cannot appreciate that the eye is now drawn to the center of my garden where the tall pole bean pyramid has been located.


Here are some details of the architecture we have now installed in out Community Patch.  We made everything "disposable."  We have to remove everything from the garden at the end of the season, so there is no need to make anything too special.


Raised Bed


For all the details of the raised bed, check out the detailed blog posts I did.  One here on the Community Patch and the other detailing some of the thyme plants on my herbal blog.


Trellis

There are several methods of creating trellis architecture in the garden.  Some are very formal, others not so much.  We have used several different methods.

Cages

We used simple wire cages, which we purchased at the hardware store, to enclose the tomatoes and peppers and give the support when the fruit will later cause the to topple.

Formed wood Trellis


This is a sturdy form entirely of pine that I nailed together to create a diagonal walk up for the cucumber climbers.  We have two cucumbers so I placed the trellis in between each plant has its own side to climb.

String Frame
peas before the frame
Sometimes all a plant needs it s a place to grow upward.  Peas love a bit of string, so i placed two natural wood sticks int eh ground and strung them back and forth with cotton string.  I will add more rows of string as the plants get longer.

 I did not want to string the entire frame up front because sun will degrade the string over time, so adding new for the top branches every week or so will give better support and longer life to the frame.


Pyramid Trellis


This trellis is for the pole beans.  They need rigid support and something tall to grow on.  They are also planted next to the bush beans so we are going to let them grow above the bush beans planted just the right and left of the center support.

We again used cotton string, this time a twisted triple or quadruple length of string which we held tight to the ground with plastic tent stakes.  In the center is the same style pine frame work we used to make the cucumber trellis.

The pine will weather to gray over the summer, which will be a nice touch!

The final look has three strings on each side for the three dominant pole beans that have sprouted from the seed we planted.

Monday, June 9, 2014

Weekly Update of the Community Patch 6-8-14

This weekend was architecture days!  After the success of the raised bed, I was emboldened to finally put in the trellis materials the vegetable plants needed. So on Saturday I installed (with help from hubby) three different structures for the vegetables to grow on.

Here is the garden this week:


Here is week one (for comparison):


This week the big additions were the raised bed for the thyme, the trellis for the cucumber, the string frame for the peas and the rope pyramid for the pole beans. I detail these items in another post on Wednesday..

Additionally the plants are beginning to bush out, flower and bear fruit.  We have green peppers, hot peppers forming, flowers on the acorn squash and tomatoes, and we were able to harvest greens for a salad this week.  To taste the first fruits is a wonderful experience.  Look to the bottom for a recipe for dressing I made to go on the greens.

The greens are doing very well and we were able to cut some of all of them to eat.


We finally have neighbors.  I guess the person who originally took the space next to mine had to decline and someone new has moved in, but she has a lot of weed work to do.  You can see she is slowly working her way from the back to the front and has a patch already cleared.


The melon and the zucchini were both attacked by the cucumber beetles, so I was glad that I waited to thin them until  later as a few plants were so eaten they had to be removed.

Melon plants thinned to 2 inches apart.

three sunflower crowding each other
I also thinned the sunflower.  Originally I planted three seeds in a hill to see how they germinated.  In one hill nothing came up, but in each of the other three hills, at least two plants came up.  This week I thinned each hill down to the strongest heartiest plant.

Thinning is a fact of growing from seed and if you do not do it, you get weak thin plants that cannot support fruit or die in the middle of the season, so bite the bullet and thin the seedling.  I usually wait until after the plants have formed to real leave.  the first leaves out of the seed are usually round and indistinct, but the second set or real leaves, are the shape of the proper leaves for the plant.

You can see the plants I plucked out were not as healthy as the one I chose to leave.

But the one left I in each hill I expect to get 2 to 3 feet tall and give me lots of sunflower seeds!
thinned sunflowers

Saturday, June 7, 2014

Final Garden Layout - Community Patch

Well I had a design plan.  Something I worked on for several weeks before going out into the garden.  I have to admit, I knew that this plan would change at planting time -- I was right.  I started planting hearty plants on May 18.  Added more seed and a few other plants on May 26 and finished with Zinnia seed, Dalias and herb seedlings and basil plants on May 31.  The I added lavender and more basil on June 3.  At which point there is not much space left to plant.  However, the patch next to mine (71) is empty and neglected, so if I do find more plants I want to grow, I may start planting them over there!

Plan on a clip board for reference on planting days

Here is the original hand written plan:


Here is the final version of that plan:

I have officially run out of room (I think) so there is little I can add to the plan now.  The first compromise was I bought more tomato plants than the original plan called for.  As a result this took the space for musk melon and zucchini, so I had to move them.  However I decided not to give the tomatoes a full 3 feet of space, going instead with the recommendations of the square foot gardening book and giving them a bit less space and caging them right away.  I will keep them trimmed and hopefully not regret this decision.

I added more paths to the garden than the original plan called for as well.  I realized how unrealistic I was being about walking in the soil as I began to plant things into the space.  I still may regret not adding one more path through the middle of the vegetable patch, as I am already having access issues.

There is much to tell about each of these plants, so I will focus on each one separately in other posts and then link them back to this one as they are written so you can just bookmark this post if you want to know the details of the plants.

Here is a breakdown by bed of the plants (the bolded letters are those used on the garden plan):

Thyme Bed
French Thyme
German Thyme
Silver Thyme
Golden Lemon Thyme
Common Thyme
Doone Valley Thyme
Lemon Thyme

Herb Bed
Kentucky Colonel Mint
Tri Color Sage
Common Sage
Dill
Hyssop
Parsley
Cilantro
Summer Savory
Greek Oregano
Fennel
Bronze Fennel
Sunset Hyssop
Tarragon
Spearmint
Calendula

Tomato Bed
Early Girl
Better Boy
Roma Tomato
Mortgage Lifter
Cherokee Purple
Pineapple Tomato
Sweet 100 Cherry
Grape Tomatoes
Sweet Basil

Salad Bed
Red and green early greens
Micro Greens (from seed)
Red Rib Sorrel
Collard Greens (from seed)
Red Giant Mustard
Arugula
Butter Crunch lettuce
Tiburan Poblano Peppers
Jalapeno Peppers
Root Celery
Broccoli
Yellow Spanish Onions (I think they all died)
Zinnia (Flower from seed)
Lemon Basil

Vegetable Bed
Burp-less Cucumbers (climbing)
Bush Salad Cucumbers
Sunflower Teddy Bear (Seed)
Better Belle Peppers
Black Beauty Zucchini (seed)
Hale's Best Jumbo Muskmelon (seed)
Dwarf Gray Sugar Peas (seed)
French Filet Bush Beans
Tigers Eye pole Beans
Christmas Lima Beans (Climber)
Dalhias (3 plants as an experiment)
Acorn Squash

Wednesday, June 4, 2014

Community Patch - Growing Thyme in a Raised Bed

I love lemon herbs.  I love all lemon herbs, but I love lemon thyme the most.  I also like common thyme and creeping thyme and well, just about any thyme you can imagine.  I grow 17 different (grew, this past winter whittled them down to 12) varieties of thyme.  About half the varieties have a lemon scent or flavor.  I could not resist the opportunity to create a special bed for the thyme plants as a way of demonstrating how to craft a raised bed.


This thyme bed is located on the far left side of my garden patch.  It receives full sun, all day!
Here is a diagram of the bed (I got this idea for describing my beds from Lemon Verbena Lady.  She used this method to explain her garden rearrangement this year.)

1           9            6

2          4           7

3          5            8

1 French Thyme
2 German Thyme
3 Silver Thyme
4 Golden lemon thyme
5 Doone Valley Lemon thyme
6 English Thyme
7 Lemon thyme
8 Golden Thyme
9 Orange Thyme


To create the raised bed, I did not clear out the existing soil, level the ground, build a frame and fill it which is the traditional method for making raised beds.  Instead I did the less-effort method.  With this method, you just scoop the soil into a low hill crafting edges or toughs around the planting area.  I even went so far as to plant the bed with thyme before I even constructed the raised bed.


To construct the raised bed I decided to use something easy to acquire and disposable.  I choose willow branches.  I collected them in the Spring, March I think.  When the snow had melted and the winter drop from the willow trees was littering the ground.  I collected a huge bundles of sticks trying for those that had varying thicknesses that were about 3 to 4 feet in length.


Using my hand trimmers I cut stakes from the larger branches.  Placing them along the edges of the bed about 4 to 5 inches apart.  I did not measure this.  I used the distance between my extended pinky and thumb if you were flashing a "Hang 10" symbol.  I wanted a spacing close enough to keep the sticks from flopping, but far enough so that I could actually weave the stems between the stakes without too much breakage.


To make the work easier, I laid several bundles of willow branches along each side so I could reach them as I went around the bed working the weave.

All you do is an alternate inside outside between the stakes.


I did opposite sides first.  I have found it is easier to work the side weave into existing ends rather than working the weave from a corner position.  With two ends (sides) completed, I have a stable place to work the side branches into at both ends which also allows me to use broken branches or those that are too short. 


Here you can see the completed weaving.  The sticks stick out the ends and will need to be trimmed as  with the upright stakes.  better to make the stakes to long and trim them off, that to have your branches pop over the top becasue the stake is too short.  I did not trim the stakes until I placed the extra soil and top dressing in the raised bed.  Then I trimmed the stkes becasue I was no longer pushing up agasint the weave.


Here is another angle on the completed weave.  Notice there are now extra stakes in each of the corners.  I placed one on the outside of each corner and on the inside.  This created a bit more stability in the corners and kept any stray branches from wanting to pop out of the weave.  If I have problems with the branches staying put (which i do not expect) I can  tie these double up stakes with wire or raffia.


Here is a slightly better view of the extra corner stakes.

notice the weeds among the thyme

Once the stakes were all in place I put top soil into the bed to bring the soil level even with the outline of the woven fence.  I then gave a top and side dressing of mushroom compost over the entire bed.  This filled the space the woven fence created making the bed uniform and attractive. Axtra compost in a raised bed is important as you are generally adding soil .  A nice cool compost like mushroom compsot is great for this.

Weeding Thyme is a pain in the butt.  Grass, small leafy plants and other things get between the branches and it is like pulling out one blade of grass at a time when you have to weed, so a top dressing of dark rich compost also cuts down on the weeds and allows the bed to hold more moisture.  Now I will not have to water this corner of the garden as often.  (Which is good because the hose does not reach that far!)

Here is the finished bed:

After I crafted the raised bed, added the compost and soil and watered the bed well, I then gave all the thyme plants a hair cut.  I harvested 1/2 of their height (I could have gone 3/4 but there would not have been much to photograph then......  They may look small now, but this trimming and the nourishing bed and they will become larger bushier plants in no time.

trimmed thyme