Friday, May 30, 2014

Weekly update of the Community Patch

I visit the garden almost daily.  Mostly to water it if it does not rain, but also to see if it needs anything.  Do I have bug or rodent issues?  Do the weeds need taming?  Things like that.

Here is the garden just after planting:

Here is the garden as of May 26th:

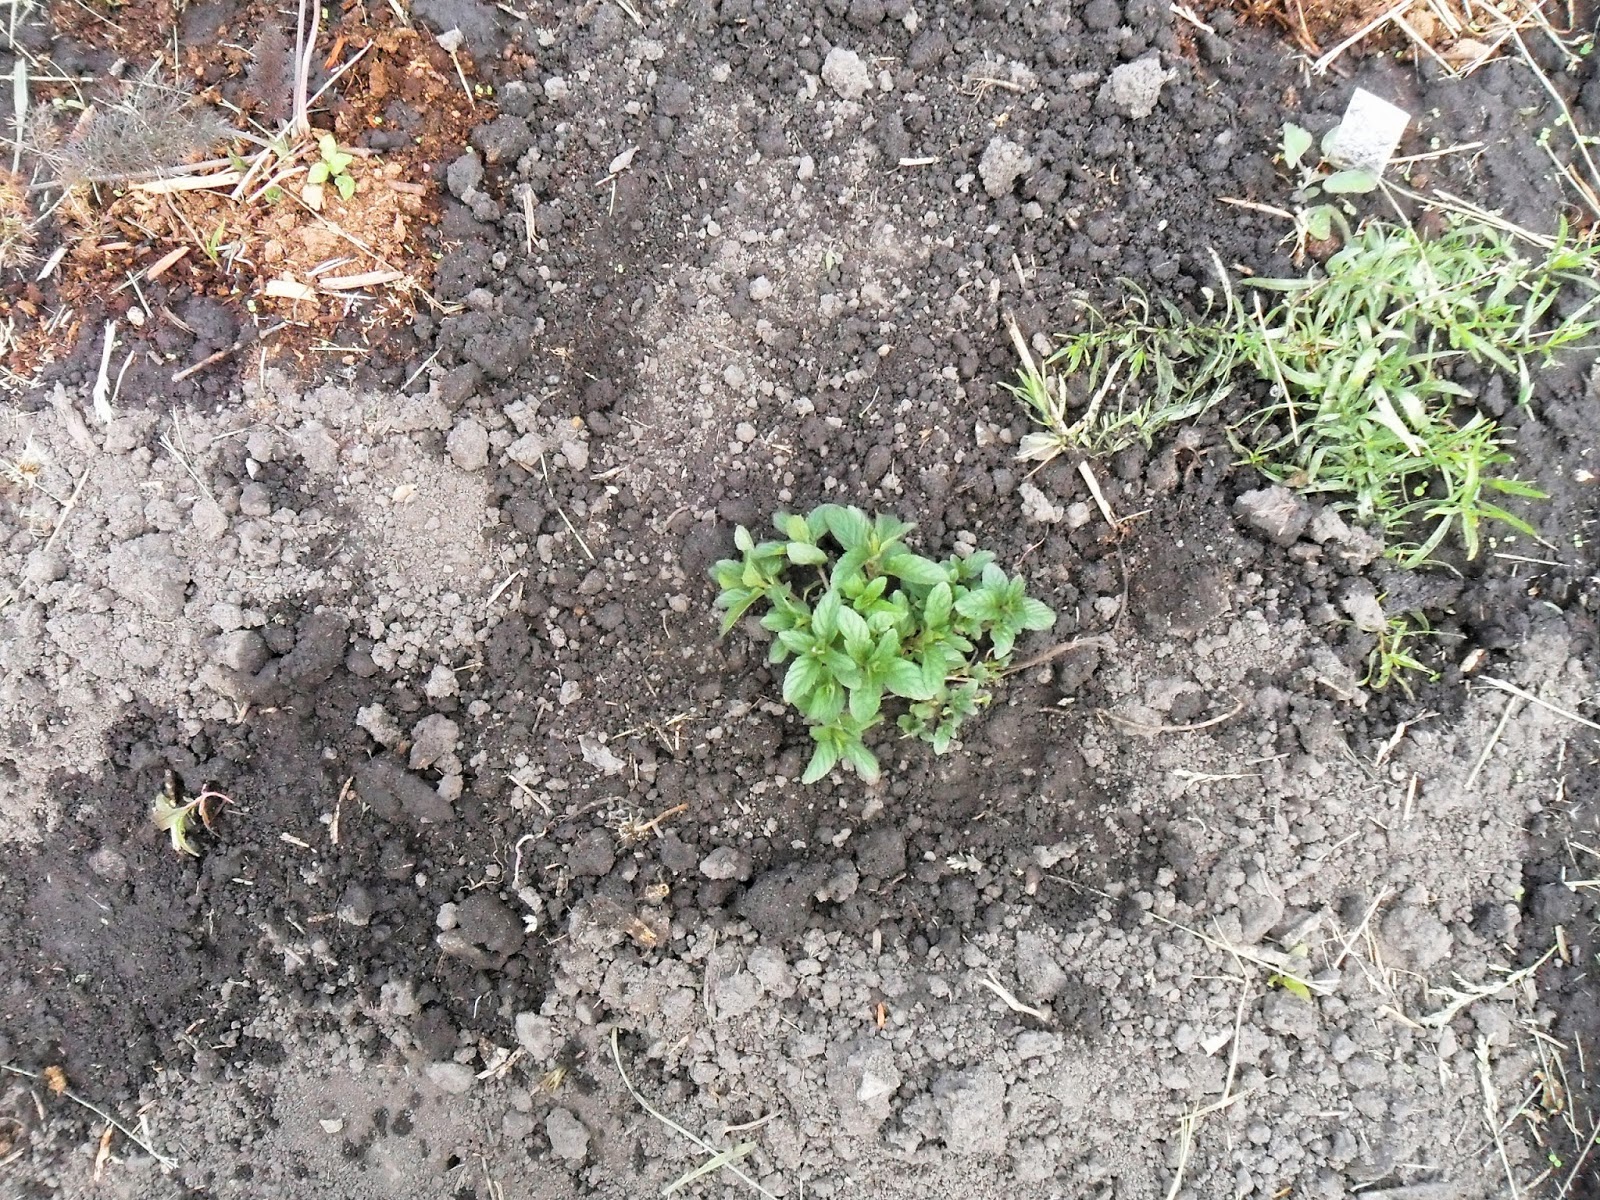
Here is is on May 31st.  Just in 4 days you can see it got more growth.

You can tell some things have gotten bigger and that I planted a few more seeds since the first weekend.  But progress is slow at first (the real reason I do not take a progress picture everyday!)

I think from now on I will take a picture on Sunday and update the blog shortly after that. The best news on this particular day is that the greens seeds (lettuces) that I planted on the first weekend have germinated.  Here is a close up.  In the next few days I will need to thin the plants to the correct spacing, but for now I will just enjoy the fact that germination has occurred!

Micro Greens Mild Mix (from Botanical Interest Seeds)
Black Beauty Zucchini (Botanical Interest) only 4 days to be this big

Sunflower Teddy Bear  (Baker Creek Heirloom seeds)
These took two weeks to germinate but at a two foot high sunflower!
Problems in the Garden

The bummer item on the list this week is that there are cucumber beetles in the garden.  This particular insect can winter over in the soil so its emergence just days after I planted the garden is unfortunate but not surprising.  I used the Organic method of squashing them whenever I saw them as the first line of defense, but they still did some major damage to the the leaves of the cucumber plants.  They have also attacked the acorn squash. I more radical method will be to steep tobacco leaves and mix the tincture with water and dish soap and spray the leaves.  I am preparing that solution now.


Here you can see the damage close up.

I think the stress of the warm weather and the long time in the too small pots reduced the plants ability to resist and repel the insects, so I will have to help them fight back.

What is a Cucumber Beetle?
Cucumber beetle is a common name given to members of two genera of beetles, Diabrotica and Acalymma, both in the family Chrysomelidae. The adults can be found on cucumbers and a variety of other plants. Many are notorious pests of agricultural crops. The larvae of several cucumber beetles are known as corn rootworms.


Cucumber Beetle
At one point last year, I thought they were artistic!  (This image is on a greeting card I made from a photo I took of Black-eyed Susan.)

Some well-known pests include the western corn rootworm (D. virgifera virgifera), the spotted cucumber beetle and its larva, the striped cucumber beetle (A. vittatum), and the western striped cucumber beetle(A. trivittatum). These should not be confused with the Colorado Potato Beetle which also has stripes. 
Potato bug (not what I have!)
The insects live about eight weeks, during which time both larva and adult feed on plants. Adults will attack the tender young growth of stems and leaves, and the buds and petals on mature specimens. They also carry and spread the bacterial wilt organism Erwinia tracheiphila and the cucumber mosaic virus. Eggs are laid in clusters on the undersides of host leaves and hatch into larvae 12 inch (13 mm) long. The larvae often tunnel into the soil to attack roots.

Cucumber beetles can overwinter in crop fields or in compost or trash piles. Eradication efforts may include manual removal, clearing cultivated areas of litter, debris, and infested plants, and application of pyrethrin-containing insecticides such as Cyfluthrin or non-systemic organphosphate insectsides such as Malathion.

How to Identify Cucumber Beetles

Adults are about ¼ inch long and have a yellow and black striped abdomen and a dark colored head and antennae. Look for holes and yellowing and wilting leaves. Crop yield will be low; and plants will produce yellow and stunted fruits. The larvae are worm-like, white, dark-headed, a have three pairs of legs on the thorax.

Often, the Cucumber Beetles alone will not kill the plants or cause major damage, but the spread of disease will. Adult cucumber beetles overwinter in weeds, garden debris and woody areas. The diseases they carry can also overwinter internally, and can be passed onto plants the next spring through fecal matter.

How to Control Cucumber Beetles

  • Inspect newly planted cucurbit plants for the presence of this beetle; be watchful when plants are seedlings.
  • Cover seedlings with row covers, though you must remove during blossoming time several hours each day to allow pollination.
  • If you till your garden in the late fall, you will expose cucumber beetles hiding there to harsh winter conditions and reduce their populations next year. Tilling has the added benefit of making the soil easier to work in the spring.
  • Where cucumber beetles are a problem, let the beetles come out of hiding and plant late. They have a knack for finding vulnerable seedlings. When yours are up and growing, the cucumber beetles will be gone, fooled into thinking you don't have any cucumbers in your garden.
  • Few insecticides can be used on cucurbit plants because they are very sensitive. They would need to be used when plants are beginning to emerge through the soil. Please contact your local cooperative extension for a list of approved insecticides for your area.
  • Natural predators include soldier beetles, braconid wasps, some nematodes, and soldier beetles.


Tuesday, May 27, 2014

Volunteers in the Community Patch - Transplanting

I was exploring the edges of my 20 x 20 garden the last time I visited and noticed several plants had taken root that I did not put here.  When I raked the soil to prepare to plant I noticed there were many tomato seedlings.  I was expecting this.


Any tomato that falls from the vine at the end of the season can leave seeds that will germinate into plants the nest year.  I did not want to risk that these were viable plants that could produce fruit (most don't) so I did not save any of those tomato volunteers when I found them.

However, the onions  (leeks) and Spearmint that I found I decided to nurture.

These I left at the corner of the garden, since relocating onions is usually disastrous, I did not want to risk that with these.
The spearmint was was on the edge of the path in the middle of the garden, so I thought it might get trampled and needed to be relocated.  I dug out out with the shovel.


Then I dug a hole where I wanted it (in the herb bed) the slightly bigger than the shovel.  I placed water and compost in the hole.

Then placed the plant in the hole, loosening the dirt around the roots just a bit.  Then a give it a good watering after firming the soil around the plant.  The key with transplanting is to take enough of the soil from the original location so that you are not tearing or damaging the roots of the plant.  They will be less shocked by the move if they travel with roots and original soil intact.

Spearmint in its new home next to the tarragon.  I guess I am assuming the tarragon will not grow much this season.

Saturday, May 24, 2014

Populate more Plants by Layering

I have a 20 x 20 community garden.  I purchased a number of plants, but being on a budget I wanted more plants than I could buy.  Several ways to handle this are to grow from seed, make cuttings from existing plants, or layer existing plants to create 'children.'

Italian Oregano  (Origanum x majoricum)
When I was planting the oregano I noticed that it had gotten a little leggy.  The late start to the season this year meant that plants stayed in small pots on the patio waiting to be planted far longer than normal.  In the case of the oregano instead of a compact low growing plant you normally see, it had long branches.  I decided I could use this "stretching," as it is called to my advantage by taking the legs or branches of the plant and rooting them to create new plants.  This technique is called layering.

Layering

Layering is taking the branch of an existing plant and without cutting it from the mother plant, bury it in soil and allow it to create a new root system.  Later you cut it from the mother plant and have a new plant you can transplant to another location in the garden.  The oregano with its long branches was perfect for this.  I planted the plant at an angle so the long branches laid along the soil.  I chose two longer healthy branches to use for layer and trimmed off the other long branches.  I used the clippings to make spaghetti sauce with that night.

You need a sharp knife or blade to do layering and sometimes a device to hold the branch down against the soil.  I keep my clippers very sharp for cutting herbs so this was the perfect tool to use for this task.  I made a slit in the bottom side of the branch.  The slit was then laid in the dirt and covered with soil.


Because the soil is rich and dense and the plant was placed at an angle to begin with, I did not need anything to hold the branch down in the soil.  However, if you are using an established plant and bending the branch down to the soil against its desire to reach toward the sun, a bit of help will be needed to hold the plant down.  A bent paperclip or hairpin work wonders.


I chose to layer two different branches on this oregano plant.  Once the soil was in place I gently watered it, being careful not to wash away the soil covering my cut area.   I then trimmed all the reaming long branches to keep the plant bushy and to give these two longer branches less competition for nutrients.  Still connected to the mother plant, these branches will get extra food from that plant until they develop a root system of their own.  This should take about 2 weeks.  It is important to keep the soil moist to encourage the root growth.


You can see the two branches lying in the soil and the mother plant, now trimmed.  In a week I will revisit this so you can see the signs it is working.

More about Italian Oregano

  • Light: Full sun to part shade
    Type: Perennial in zones 5 to 10
    Planting time: Spring, fall
    Features: Strongly aromatic and flavorful, dark green leaves, small white flowers
    Soil: Moist but well drained, pH 6.5 to 8
    Plant spacing: 12 to 18 inches apart
    Plant size: 12 to 18 inches tall
    Garden use: Herb garden, containers
          Plant use: Major ingredient in Italian cuisine

  • Savor classic Italian cuisine with the flavorful leaves of this oregano. An easy-growing plant for the garden or container, Italian oregano hails from the Mediterranean region. It thrives with lower humidity and well-drained soil. In the garden, use this oregano as an edging plant. Plants spread when happy, rooting along the stems. Harvest leaves or stems anytime during the growing season. Flavor is most intense just before plants flower. Trim plants often to keep flower formation at bay.

Friday, May 23, 2014

How to plant nursery plants

Most of the plants I placed in the garden came from a nursery.  I also have some winter sown seedlings that I will plant next week so i will talk about those then.  I also am going to grow some plants from seed.  That discussion will be in a day or so.

For today we are going to talk about how to give a nursery plant a good home so it will thrive in your garden.


These are the plants.  I obtained them from four places.  A couple I acquired at the Home Depot.  These are in peat pots from Bonny Plants.  I got basil and lemon balm on a whim when i was searching for a new patio pot.  Most came from the Herb and scented plant sale at the Oak Park Conservatory.  The Herb sale is their big fund raiser, although they do not have many herbs anymore I still support the sale and there are a few items you can only get there which I return each year for.  Several of my tomato plants, a few herbs and the cucumbers all came from the Conservatory.  I stopped at the Good Earth Nursery on my way home from the herb sale and got a few heirloom tomatoes, root celery, and a couple more herbs plants.  Luurs Garden Shoppe, which is my local nursery, less than two miles from the apartment is where I always get my potting soil, compost and other supplies like that, I picked up several thyme plants from them.  They stock an amazing selection of perennials and I cannot wait to shop there when I finally move out of the apartment!  I also won 4 broccoli plants at the garden club meeting in April.

So first things first.  The soil must be ready to be worked.

I laid out the garden with the plants still in their pots to make sure there was space.  I referred to notes, plant stakes and my own research to determine plant spacing.  Once I knew where I was placing the plants then I could dig holes.  Never take the plants out of the pots and leave them laying on the ground with bare roots.  They will dry out so quickly in the sun and the stress to the plant can be catastrophic.  All plants suffer from transplant shock adding dry roots to that and you can kill some less hardy plants.


Using a trowel or shovel, I like a hand shovel, dig a hole that is twice the size of the root ball of the plant you are planting..  This is my ergonomic shovel and I can dig with this all day without straining my wrist.  I admit this is an older tool, I have had it for years using it in my herb garden.   Use a ruler to measure over from the center of the hole to make the next hole when planting multiple plants. 


Toss a handful of compost into the bottom of the hole and water the hole liberally. This is a pepper plant so I just added some mushroom compost.  Organic materials like peat moss, composted grass clippings or plant material would also be perfect.  You just want to give them a bit of a food boost.


Then plant the plant, firming the soil around the plant with your hands enough to keep the plant upright and  the soil from washing away from the plant when it rains or the plant is watered, but not so firm that you press out all the air pockets around the plant.  Remember plants breathe from the roots so spaces in the soil for air are needed. Water the plant well after planting, then move to the next plant.  This is a bush cucumber.  

I place the plant tags that came with the plants in the soil near them.  I will eventually replace these with a larger, easier-to-read tag, but for now, it will keep them identified and allow me to remember what is what.  If it did not have a nursery tag, I wrote the name of the plant on a Popsicle stick and put that in the ground instead.

I put a top dressing of peat moss around the plants as a first layer of mulch to help the soil hold moisture.  I may add more mulch later.  I am waiting to see how the soil sheds water and if I need mulch for weed control. There is a lot of "unknown" in a Community Garden the first year.  In your own yard you will have a better grasp of the soil needs and quirks.

That is it, there is no other technique needed to plant these vegetables and herbs.  Just keep in mind that certain plants, like squash, are grown in a hill rather than on flat ground.  You mound up the dirt and place the plant in the center of the hill or if growing from seed you place three seeds in a hill and thin to one plant once they germinate and grow.

Here are  three planted hills of Zucchini.  I am growing that from seed.

Next time I will demonstrate layering.
.

Thursday, May 22, 2014

Garden Planted!

I had a plan to plant on May 9.  Instead we had downpours that resulted in soil too wet to plant in.  Then I had to wait a week due to a turn in the weather.  I was finally able to plant on Sunday, May 18.  It was in the 80s that day, but had been cold and snowing just two days previous.  It was still a risk to put plants in the ground with our changeable weather, but I went ahead and planted plants and seeds in an all day marathon.

Time wise (so you can compare)  I was able to get the plants and seeds in the garden in about 3.5 hours.  I started around 10 am and worked until about 1:30 with a break for lunch around noon.  That included planting and watering.  I spent another hour on that day placing some peat moss around some of the plants and rewatering so that would not blow away.

I had to rake out the weeds that were sprouting int he space, but did not need to till the soil,m as the park district did that.

Here are some images of the work:


Plot #72 with a few planting areas marked with flour.
The final garden plan (as designed)  This is subject to change during planting, but I had a rough idea of what I wanted to do using this plan I created in advance.
Tools: shovel and rake; watering cans; hand tools including trowels, hand rake, and ruler; plant markers, clip board with plan; brown paper bag with seed packets; cooler with water and snacks.
The plants mixed in two flats and an extra two cardboard boxes
The first thing I did was mark the handle of my rake with markings ever two inches for 1 foot, then 6 and 12 inch increments after that.  Now I just lay it down on the ground and  can easily space plants.

You can see how close the RR tracks are!  This is before work began, nothing raked or placed.

After raking a good portion of the plot (20 feet by 20 feet) I then placed out the plants based on the plan to see if everything would fit as desired.
We have way more tomato plants that originally planned, so that changed the diagram.  We also put in a few more paths that I planned too to make it easier to get in and take photos for future blogs.

That portion int he middle which is not raked is for seeds I did not intend to plant on that day, so I chose not to rake it until I was finished planting the other areas.

Here is a sneak peak of the completed planting, I will provide details of the how we got to this point in another post.


Wednesday, May 7, 2014

Choosing What to Plant in your Garden Patch

This is harder than you might think to decide what to plant. In my previous post I listed a number of plants that I bought, but I admit that I am using years of experience about how many and what types for my garden.  Even though I have never done this type of garden, I have gardened before now.

If you are starting small, you have to limit yourself to a handful of plants. If you are growing vegetables start with what you like to eat and what you can't find fresh locally. Corn takes a lot of space and remains in the garden a long time before it's ready to be eaten. If you have corn farms nearby, you might want to use your small garden for vegetables that give a longer harvest, like tomatoes, lettuce and beans. My husbands said - NO corn in the garden for just this reason.  He said , if you want corn go to the farmer's market, they always have it and it is good.
Flower gardens can be even harder. Start with what colors you like. Rather than basing your dream on a photograph from a magazine, take a look at what your neighbors are growing successfully. They may even be able to give you a division or two.  The Men's Garden Club of Villa Park is having their plant sale May 9 & 10 and many of the plants available have come from local gardens so not only can you find out how they did, but you know they grow here!
Probably should not start with this!
Take a walk around a couple of garden centers and read the plant labels. Then play with combining the plants that strike your eye until you find a combination of 3-5 plants that pleases you. Make sure all the plants have the same growing requirements (Sun, water, pH...) and that none of them are going to require more care than you can give them.
Keep the variety of plants limited. It makes a better composition to have more plants of less varieties than to have one of this and one of that.
Let the planting begin

Sometimes you have to plant when you have the time, even if that's high noon on a Saturday. But the ideal time to plant is on a still, overcast day. The point is, stress your new plants as little as possible. Here are a few easy steps to follow:


·                        Water the plants in their pots the day before you intend to plant.
·                        Don't remove all the plants from their pots and leave them sitting in the sun for the roots to dry out.
·                        If the roots are densely packed or growing in a circle, tease them apart so they will stretch out and grow into the surrounding soil.
roots
·                        Bury the plant to the depth it was in the pot. Too deep and the stem will rot. Too high and the roots will dry out.
·                        Don't press down hard on the plants as you cover them. Watering will settle them into the ground.
·                        Water your newly planted garden as soon as it is planted and make sure it gets at least one inch of water per week. You may have to water more often in hot dry summers. Let your plants tell you how much water they need. Some wilting in noonday sun is normal. Wilting in the evening is stress.

·         
      Mulching
      You hear a lot about mulching, but it really does make a major difference in a garden. Mulch conserves water, blocks weeds and cools the soil. Organic mulches like shredded or chipped bark, compost mulch from old leaves and grass, or event straw, will also improve the soil quality.

      Plastic mulches are nice in a vegetable garden to heat the soil around warm season crops like tomatoes, peppers, melons and squash.  Whatever mulch you choose, apply it soon after planting, before new weeds sprout. Apply a 2-4 inch thick layer of mulch, avoiding direct contact with the plant stems. Piling mulch around the stem can lead to rotting and can provide cover for munching mice and voles.

·         
K
      Keeping a Record
      Keep a record of what you have planted or better yet, keep the labels that came with your plants. This will help answer any questions about what the plant may need if it starts looking poorly and will remind you next year of what you liked and what didn't work. It also helps to take pictures and label them. You'll remember color combinations and favorite plants.

·        You can start a garden journal (check out one of my early posts for two types which will work great.) With a garden journal you can record how plants perform, when flowers are in bloom, how large a harvest was and all kinds of information that will help you make a better garden next year.


Hopefully when you were selecting plants you did some background checking and didn't select too many prima donnas. All plants are going to require some maintenance. The idea that perennial plants require less maintenance than annuals is wrong.  Choose a few good gardening books and read up on the plants you choose, so you have less surprises.

It may happen that one of your choices isn't happy and dies.  That is a fact of gardening life and not a sign you cannot do this.  Move on and replace it with something else.  I love to grow thyme.  Thyme dies.  Plants you have had flourishing for multiple years, just die. Each year I choose a new variety of thyme to grow, just in case one of my long-term residents, takes a bad turn.  This year, I will be trying several new plants!!

Water Needs
At the very least your plants will require an inch of water a week.  If it rains regularly, good for you and your garden!  If not, don't let your plants get drought stressed.  Once a plant is stressed it will never recover fully in this growing season.

My first challenge of the Community plot was an email informing me that the water is not turned on at the garden and that they will be repairing leaks and that the water may not be fully functional for some time.  I think this means I will need to bring filled watering cans when I plant later this week.I shudder to think about filled watering cans in my car!!
Enjoy the Garden
You've heard the saying "Stop and smell the roses"? Gardeners can be the worst at taking that advice. We're so busy with our heads down at soil level, pinching, pruning and pulling every weed, that we often don't appreciate what we've created until someone else tells us.
Step back and enjoy what you've accomplished.
Come back Friday and Saturday for the details of my garden planting for this year!


Monday, May 5, 2014

Ready to plant the Community Plot

I could get into my 20 x 20 foot Community Patch as of May 1, however my teaching schedule made that date not work for me.  The weather did not cooperate either as May 1 was cold and blustery.

I knew others would be able to get into the gardens before I could so I stopped over the day before to string off my space and mark a few places where I was going to plant seeds and plants.  Over the weekend I when plant shopping. Here is what I purchased:

  •  Peppers: Jalapeno and Pablano
  •  Tomatoes: Grape Tomatoes, Sweet 100, Mortgage Lifter and heirloom Tomato plants: Pineapple and Cherokee Purple
  •  Cucumbers: Burpless and Salad Bush
  •  Salad Greens: bib lettuce, arugula, red leaf lettuce, red stem sorrel, giant red mustard
  •  Broccoli                                                
  •  Acorn squash
  •  “Brilliant” Root Celery
  •  Yellow Sweet Spanish Onions
  •  Herbs: lemon balm, spearmint, lemon grass, bronze and green fennel, spicy globe basil, lemon basil, sweet basil, sunset hyssop, many varieties of thyme, tricolor sage, oregano,

The weather is going to be warm this week, so I have decided since the last frost free day is between May 10 and May 15 depending on who you listen to, that I will plant the bulk of the perennial herbs and some cold hearty herbs and vegetables as well as a number of seeds on May 9th.  I may save the tomatoes, cucumbers, and basil until the following week.

This was the originally garden plan I created while working with my books.  I got so caught up in placing things I forgot to pay attention to scale:

 
one square = 1 foot (it was seeing 6 feet of lettuce that I realized my mistake!)

This is what I finally decided on, the spacing is much more accurate and I left myself enough spaces for late additions and whimsey!
scale 1 square=1 foot (now the greens includes more than lettuce!)
I will detail the plot and the plants placed with close up shots after they go in.  This garden is going to have lots of items to can, dry, preserve and share!