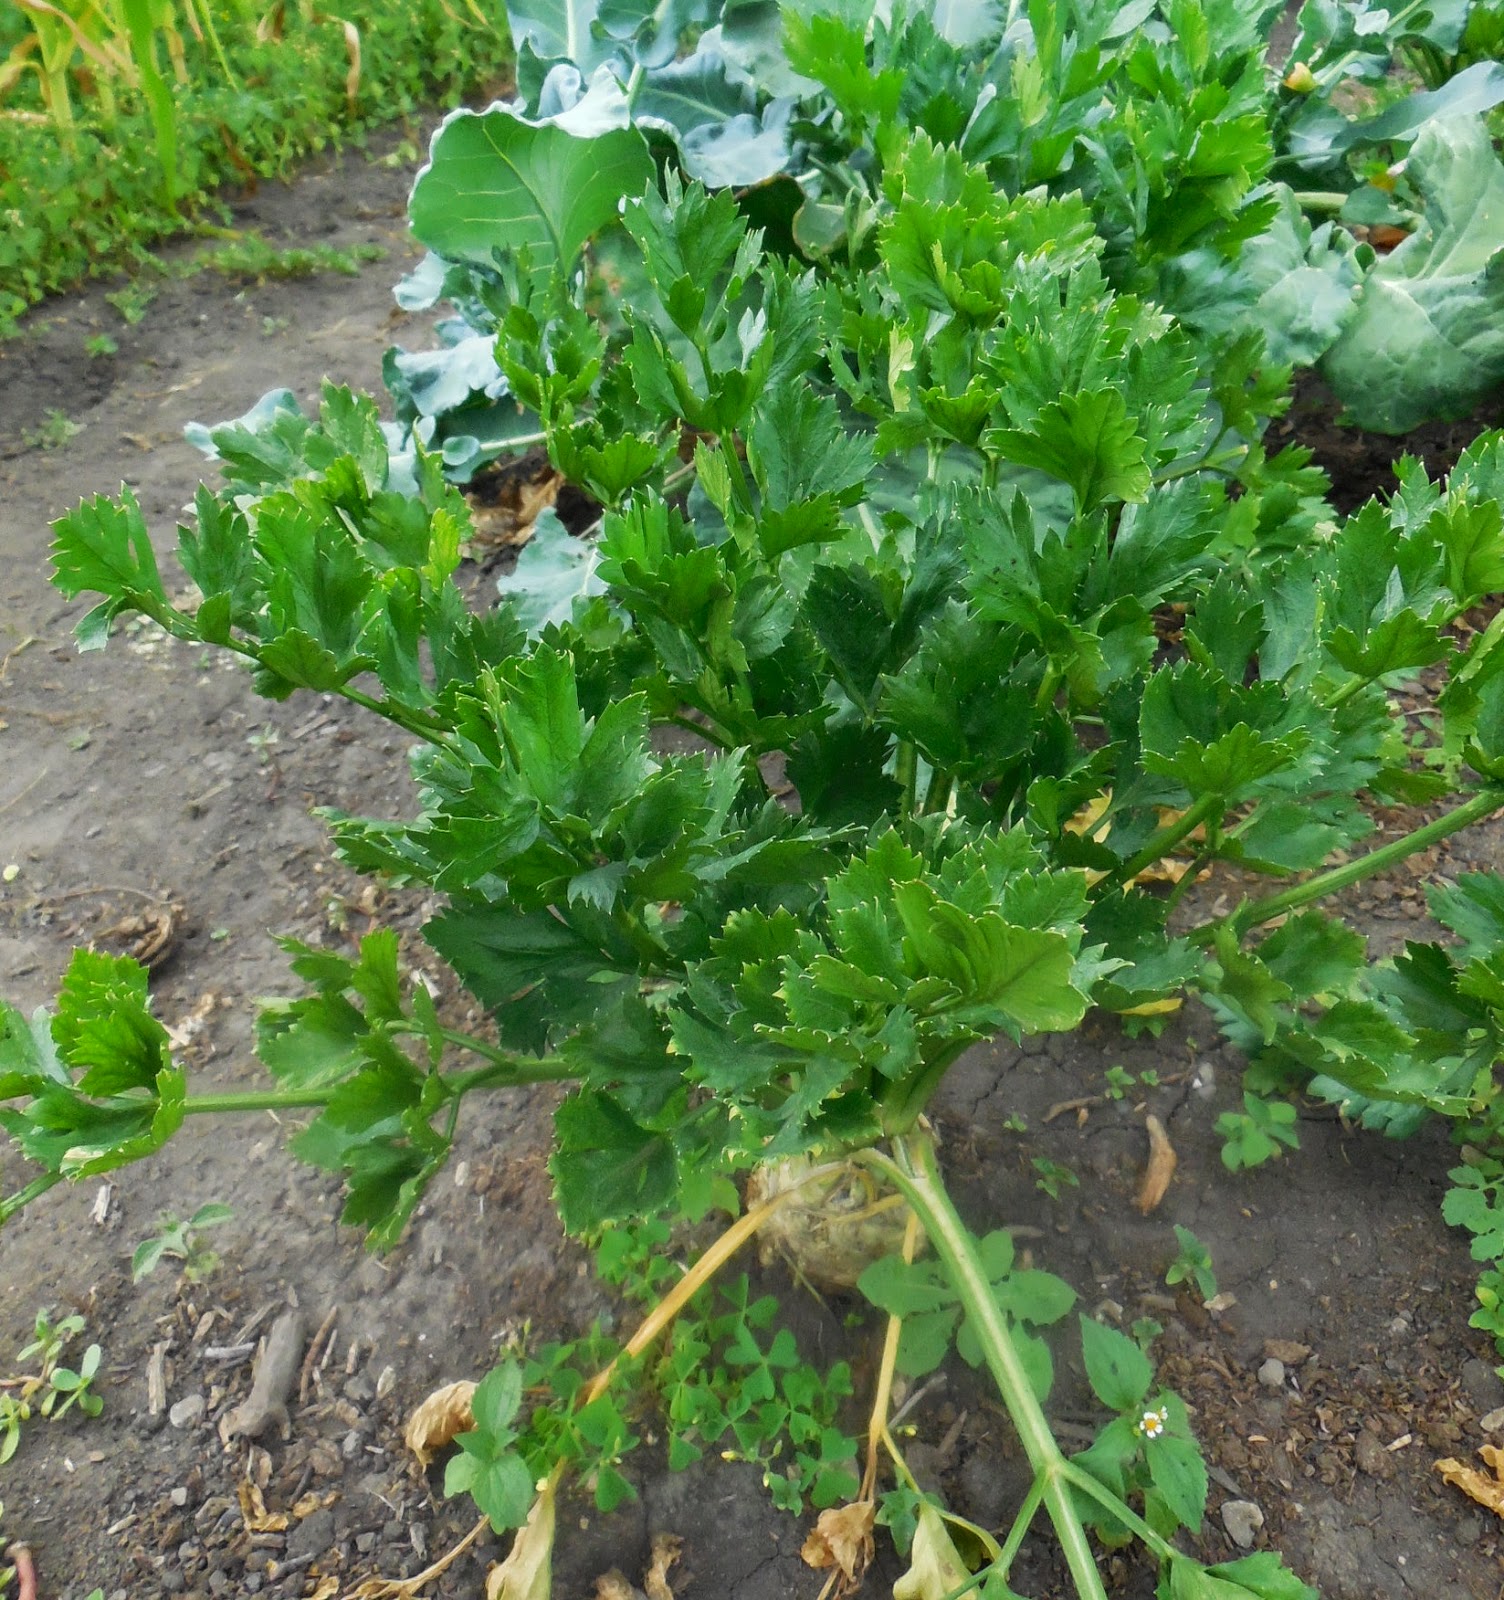
One of the plants I grew this season for the first time was Celeriac or celery root. It was easy to grow, you plant it and forget about it and harvest int he fall.
It was totally bug resistant, grew well and needed watering only occasionally.
I would recommend it. I even harvested the leaves from it to put in soups and stews and sauces and that was good too, even though the books said it might not be.
This is a recipe I found that we tried with the last two roots we harvested just before the first frost in late October 2014. (Full recipe at the bottom of the post!)
 First step was to soften the peeled Celeriac which was done by simmering it in chicken broth and cream for about 30 minutes until the celeriac was tender.
After that the bulbs were cut into potato-like slices to go into the casserole dish.
 Now place the slices in the casserole with the thyme.
Now grate the cheese. We used a small food processor, but you can also do it by hand with a grater.
Spread the Cheese over the prepared root in the casserole and bake for about 30 to 40 minutes, until the cheese has browned the the sauce is burbling.
It was totally bug resistant, grew well and needed watering only occasionally.
 |
| You can see the leaves and bulb in this early August 2014 photo |
 |
| Leaves, photo taken in late July 2014 |
 First step was to soften the peeled Celeriac which was done by simmering it in chicken broth and cream for about 30 minutes until the celeriac was tender.
After that the bulbs were cut into potato-like slices to go into the casserole dish.
 Now place the slices in the casserole with the thyme.
Bring the sauce to a boil and add the other ingredients to it. Simmer for a bit then place it over the prepared celery root. Do not worry if it looks like soup over the root it is supposed to.
Now grate the cheese. We used a small food processor, but you can also do it by hand with a grater.
Spread the Cheese over the prepared root in the casserole and bake for about 30 to 40 minutes, until the cheese has browned the the sauce is burbling.
What you get is a rich side dish, without the heavy starch flavor of potatoes. It was perfect with the pork chops we had for dinner that night and with the nut crusted chicken breast we had the next night. The cooking in the broth made the root soft and tasty and not tough. This is a dish you could serve at Thanksgiving without any complaints!
Celeriac Gratin
- 1 cup chicken broth
- 2 cups heavy cream
- 2 large celery roots
(celeriac bulbs)
- 2 tablespoons
whole-grain Dijon mustard
- 1 teaspoon sea salt
- Freshly ground pepper,
to taste
- 1 teaspoon fresh thyme
leaves
- 1 cup finely grated
Gruyere cheese
Directions:
In a large pot, bring vegetable broth and cream to a
simmer. Trim the ends of your celeriac and use a sharp knife to peel the bulb.
(Don't bother with a vegetable peeler, the tough skin needs something sharper.)
When the bulbs are peeled, quarter each bulb, lengthwise. Add celeriac to the
pot of simmering liquid. Cover and cook, turning occasionally, until the
celeriac is tender (about 30 mins).
Heat oven to 350 degrees. Remove pot from heat. Use
a slotted spoon to transfer celeriac pieces to a large cutting board. When cool
enough to handle, slice the celeriac into 1/4-inch-thick slices.
Layer the sliced celeriac in the bottom of an ungreased
baking dish. Worry some over creating a pretty design, but not too much.
Sprinkle with fresh thyme leaves. Bring the liquid remaining in the pot to a
boil (watching carefully to make sure it doesn't boil over). As the liquid
thickens, add mustard, salt, and pepper to taste. Pour the mixture over the
layered celeriac, covering completely (if it looks soupy, all the
better). Sprinkle the cheese evenly over the top, covering completely.
Garnish with a sprig or two of thyme and bake for from 35 to 40 minutes, until
the liquid is burbling and the cheese has turned richly golden-brown. Serve hot.
Notes: You can substitute a rich vegetable broth instead of chicken broth. Cooking the
celeriac in the broth prior to baking gives it a rich flavor and ensures that
the root vegetable won't be tough or stringy after baking.


No comments:
Post a Comment