Sunday, January 11, 2015

Garden Wrap up 2014

The garden plot failed in 2014!

There is no other way to say it.  Except for the herbs which flourished until frost all the other plants in the garden were dead by the end of September.

the row of dead plants to the left are my neighbors dead sunflowers on 9-31-14
That collection of green in the middle is lettuce that reseeded in the space where the tomatoes used to be.
The creeping death moved from one plant to another and without fail turned even the healthiest plants into brown shriveled dead non-growing things.

I was unwilling to admit this and never quite finished the posts from late September that documented this death. But I have located all the photos and will update those posts in the next few weeks so others can scroll through and see what happened.

It is my opinion, based on the types of plant death that occurred and the fact that the herbs were mostly unaffected by this problem, that the soil was to blame for the issues.  The soil may have had plenty of nutrients or not, I did not have it tested once the plants started dying from diseases that were not soil quality related.  The soil was littered with several identifiable bacteria.  Check out my post on what was wrong with the tomatoes to see what I mean.

The garden plots have been traded to the City of Elmhurst to use for flood retention so will not be used in the coming year.  It is assumed we will get new areas to plant in for 2015, but I have not been informed of any locations as yet.  I am pleased that these plots are not to be used again as they were too far gone to repair and would have had to have been left fallow for a couple of years to start any possibility of repairing the soil and killing off the bacteria in the soil.

What I wanted to be able to do in 2014 was raise enough vegetables to freeze and can and be able to use them all winter and post about the process of preserving the vegetables.  However, there was never enough harvest to go beyond our personal use for the days following a harvest.  The herbs were very prolific and showed no sign of disease and I am still using the herbs I dried from the community patch.  Herbs are generally resistant to soil borne illnesses so their success only reinforced my belief that the soil was healthy in nutrients but also rampant with bacteria.

What I did learn and want to pass on as an important note is that if you have a community plot and are hoping to grow old-fashioned heirloom varieties of plants, you may want to reconsider.  Many hybrid plants were hybridized to make them more resistant to diseases that occur naturally in the soil and are hard to remove.  As a result they would have been much more resistant to the diseases that eventually killed the plants.  We grew a couple of hybrid peppers and those were the last plants to die in the garden.

jalapenos still producing on 9-31-14
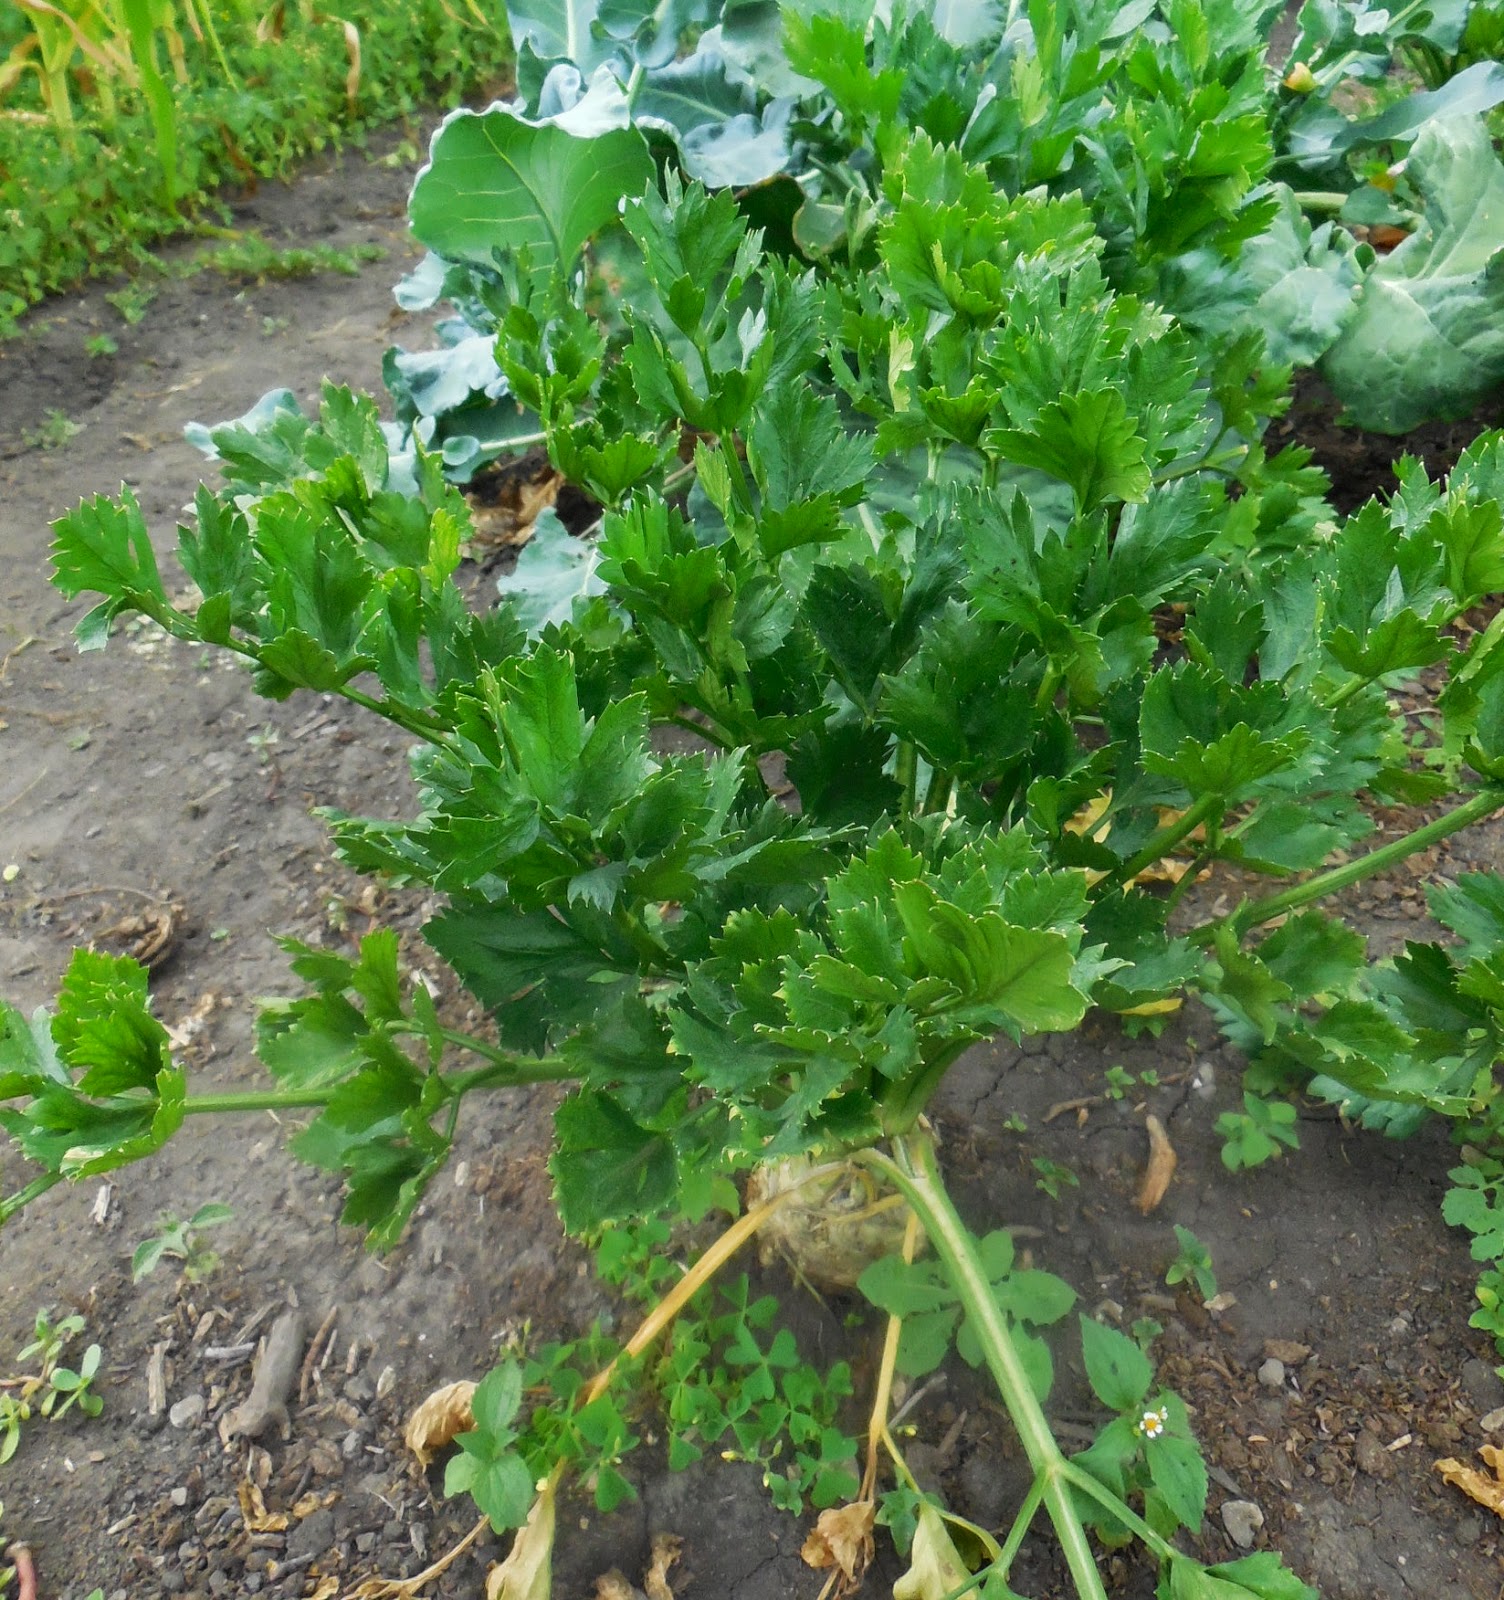
The cucumber was the most damaged by soil issues and the sheer number of bugs the garden had because of the previous winter.  Squash and melon, all grown from heirloom seed, were the first to show signs of problems.

The various beans did okay but did not continue to produce after an initial harvest.  We were able to save enough seed that we can probably grow more next year.  The tomatoes were slow and had damaged fruit, but probably would have lived longer and produced more except for the incredibly wet weather we experienced.  The soil was not dry enough for them and their root systems and they eventfully rotted from the bottom up.

dead sunflowers
The sunflowers just died within days of reaching flowering stage.  They were beautiful one week and dead the next.

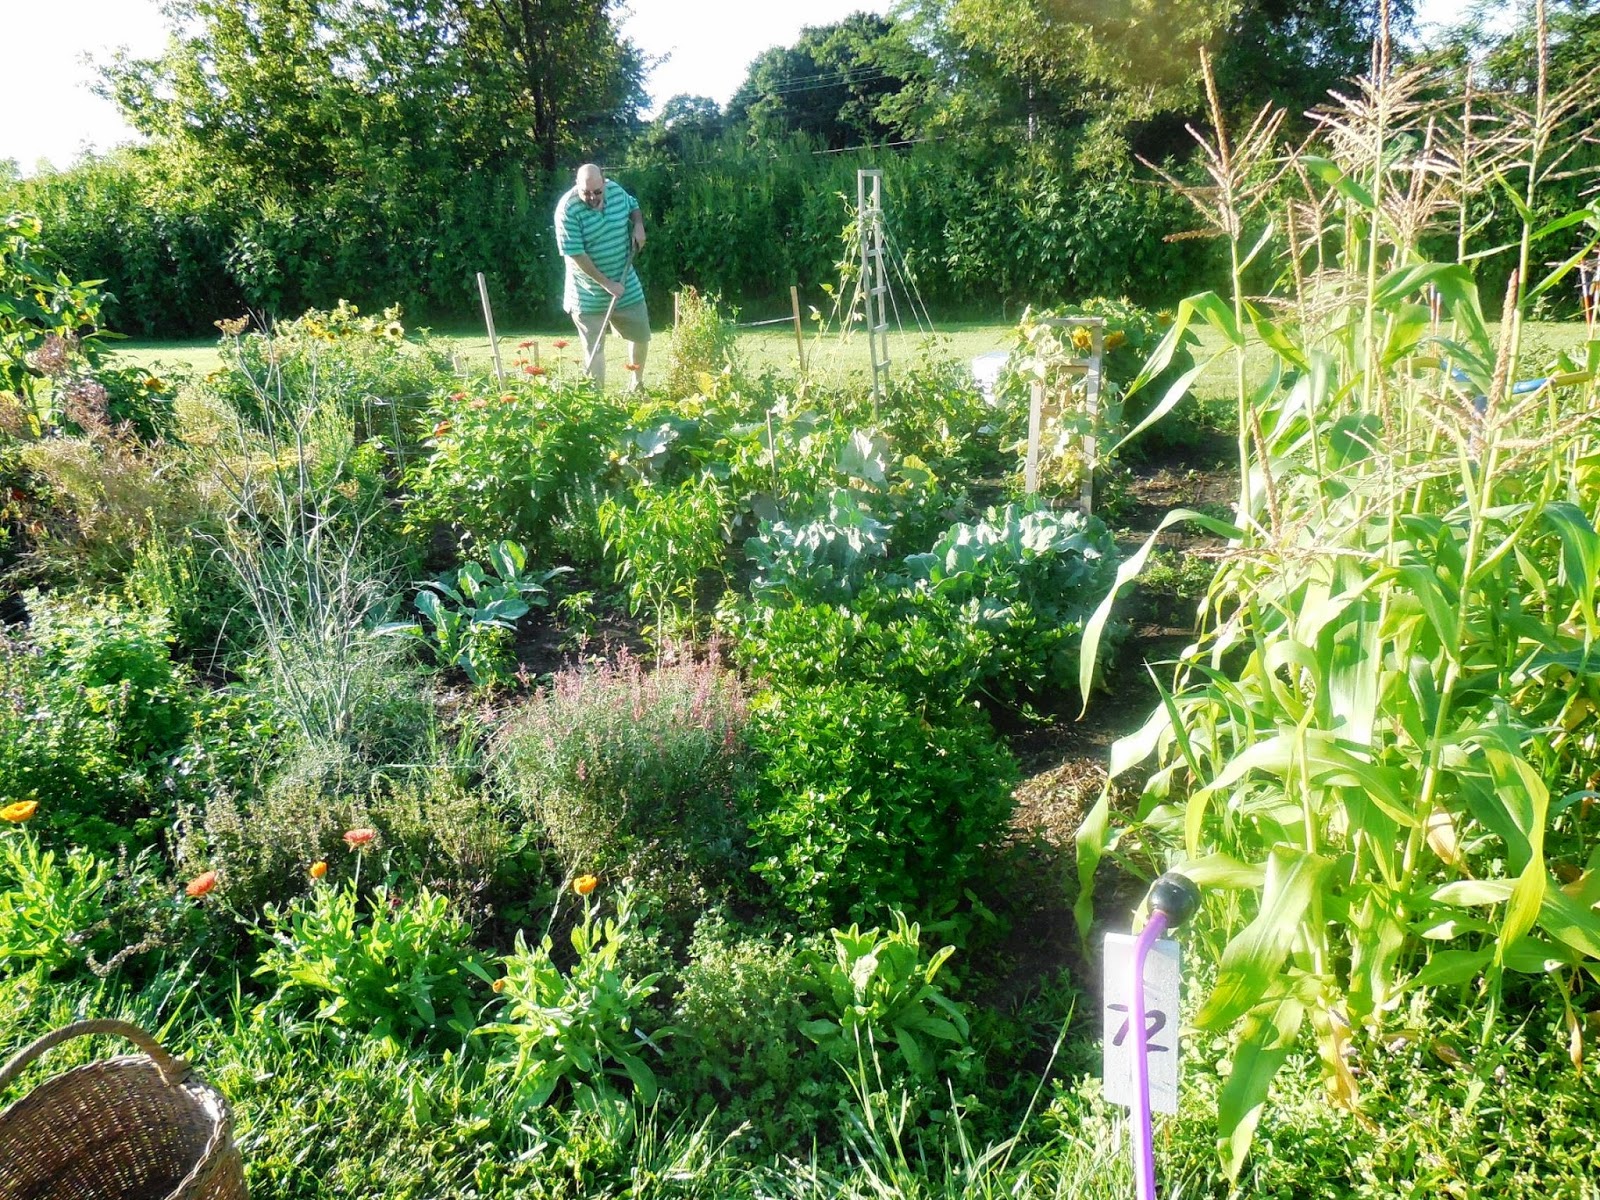
The zinnias, grown from seed, did very well, but the bugs did make finding a perfect bloom hard.  The dahlias never flowered.  The calendula, however, flowered until frost and I harvested hundreds of petals to use in tea.
The yellow flowers along the front are calenula

Sunday, November 9, 2014

Celeriac Gratin a Thanksgiving Recipe

One of the plants I grew this season for the first time was Celeriac or celery root.  It was easy to grow, you plant it and forget about it and harvest int he fall.

It was totally bug resistant, grew well and needed watering only occasionally.

You can see the leaves and bulb in this early August 2014 photo
I would recommend it.  I even harvested the leaves from it to put in soups and stews and sauces and that was good too, even though the books said it might not be.

Leaves, photo taken in late July 2014
This is a recipe I found that we tried with the last two roots we harvested just before the first frost in late October 2014. (Full recipe at the bottom of the post!)

First step was to soften the peeled Celeriac which was done by simmering it in chicken broth and cream for about 30 minutes until the celeriac was tender.

After that the bulbs were cut into potato-like slices to go into the casserole dish.
 Now place the slices in the casserole with the thyme.
Bring the sauce to a boil and add the other ingredients to it.  Simmer for a bit then place it over the prepared celery root.  Do not worry if it looks like soup over the root it is supposed to.

Now grate the cheese.  We used a small food processor, but you can also do it by hand with a grater.


 Spread the Cheese over the prepared root in the casserole and bake for about 30 to 40 minutes, until the cheese has browned the the sauce is burbling.
 

What you get is a rich side dish, without the heavy starch flavor of potatoes.  It was perfect with the pork chops we had for dinner that night and with the nut crusted chicken breast we had the next night.  The cooking in the broth made the root soft and tasty and not tough.  This is a dish you could serve at Thanksgiving without any complaints!

Celeriac Gratin
  • 1 cup chicken broth
  • 2 cups heavy cream
  • 2 large celery roots (celeriac bulbs)
  • 2 tablespoons whole-grain Dijon mustard
  • 1 teaspoon sea salt
  • Freshly ground pepper, to taste
  • 1 teaspoon fresh thyme leaves
  • 1 cup finely grated Gruyere cheese

Directions:
In a large pot, bring vegetable broth and cream to a simmer. Trim the ends of your celeriac and use a sharp knife to peel the bulb. (Don't bother with a vegetable peeler, the tough skin needs something sharper.) When the bulbs are peeled, quarter each bulb, lengthwise. Add celeriac to the pot of simmering liquid. Cover and cook, turning occasionally, until the celeriac is tender (about 30 mins).

Heat oven to 350 degrees.  Remove pot from heat. Use a slotted spoon to transfer celeriac pieces to a large cutting board. When cool enough to handle, slice the celeriac into 1/4-inch-thick slices.

Layer the sliced celeriac in the bottom of an ungreased baking dish. Worry some over creating a pretty design, but not too much. Sprinkle with fresh thyme leaves. Bring the liquid remaining in the pot to a boil (watching carefully to make sure it doesn't boil over). As the liquid thickens, add mustard, salt, and pepper to taste. Pour the mixture over the layered celeriac, covering completely (if it looks soupy, all the better). Sprinkle the cheese evenly over the top, covering completely. Garnish with a sprig or two of thyme and bake for from 35 to 40 minutes, until the liquid is burbling and the cheese has turned richly golden-brown. Serve hot.


Notes: You can substitute a rich vegetable broth instead of chicken broth. Cooking the celeriac in the broth prior to baking gives it a rich flavor and ensures that the root vegetable won't be tough or stringy after baking.

Monday, September 15, 2014

Carrot & Kohlrabi Slaw recipe

Carrot & Kohlrabi slaw
Chik-fil-a used to sell (in Illinois anyway) a great carrot salad, which I have since learned is actually of French origin.  Recently I saw a recipe for carrot and kohlrabi slaw that made me think, this is what I can do with the plants I added late in the season to my garden. Grated kohlrabi gives this carrot salad a peppery, crisp edge.

2 bulbs kohlrabi
4 carrots
3 Tbsp. vegetable oil
2 Tbsp. cider vinegar
1 Tbsp. whole grain or Dijon-style mustard
1/2 tsp. sea salt
Freshly ground black pepper to taste

Directions:
Peel kohlrabi and carrots. Be sure to cut off all of the tough outer peel of the kohlrabi. Set them aside. In a salad bowl, whisk together the oil, vinegar, mustard and salt until well blended. Add pepper, if you like. Using the large holes on a standing grater or a mandoline set up for fine julienne, grate the kohlrabies and the carrots into the salad bowl. Toss everything together until the kohlrabi and carrot are evenly coated with the dressing. Taste and add more salt or pepper, if you'd like.


Marcy notes: Since I recently obtained a mandoline I decided to use it to make julienne slaw pieces rather than using my grater.  The texture is much firmer this way.

Thursday, September 4, 2014

Summer Squash Quiche recipe

Before the squash finishes for the year, try this tasty breakfast or dinner treat.  Serve it with crusty bread or a cup of soup.

1 9-inch unbaked pie shell
1 cup Pepper Jack Cheese, shredded
1 cup Sharp Cheddar,shredded
1/2 cup Zucchini, chopped
1/2 cup Yellow Summer Squash, diced
1/2 cup onion, chopped

1/4 cup Green Bell Pepper, diced
1/4 cup Red Bell Pepper, diced
1/2 cup tomatoes peeled and diced
2 garlic cloves, minced
1/2 teaspoon thyme
1 teaspoon oregano
1 teaspoon basil
1 tablespoon parsley
1/4 teaspoon cayenne pepper
1 teaspoon salt
1 teaspoon pepper
8 eggs beaten 
2 cups evaporated milk or half and half
Sliced Tomatoes for the top

Directions:

To prepare the pie shell, bake the pie shell for 5 minutes at 400 degrees then cool. Mix all the Squash, onions, bell peppers, chopped tomatoes and garlic. Add all the herb and spices, mixing well. Whisk the eggs and milk together in a large bowl, pour in the squash mixture to the egg mixture. Blend the Jack Cheese and Cheddar Cheese together. Spread the cheese into the bottom of the cooled prepared pie shell then add the egg and squash mixture.  Bake the Quiche at 400 degrees for 10 minutes and reduce the heat to 350 degrees for 50 to 60 minutes or until the Quiche is set.  Place the sliced tomatoes on top and allow to cool or serve hot.

Saturday, August 30, 2014

Cutting your Zucchini

Zucchini is prolific in a garden even if you only have three plants like I do.  We grew ours from seed.  Placed thee seeds in a hill and thinned them to one plant in each hill.  However, they still grew large and spread into the path and are covered with blossoms and fruits.  We have about 5 so far and I am looking forward to using them.  I will share recipes and experiments as time goes on.

How you use your zucchini sometimes requires different treatment and I thought I would start with how to cut your zucchini first, then move into recipes later.

The first technique is to dice the zucchini


 If you are going to make soups or stews this is the perfect bite size.

Shredding your zucchini with a box grater or food processor

This technique creates threads you can use in slaws, lasagna, omelets,
add to ground meat in your meatloaf, or to make breads. If you want to make sure your finished product is not water, sprinkle the zucchini with
salt to draw out the excess moisture then rinse and pat dry before
adding to slaws and other similar dishes.


You can slice your zucchini crosswize to create disks.
These shapes are great in stir fry, casseroles, any scalloped dish,  or a meat and veggie saute.  You can also slice on the diagonal to get a more oval shape.This is the shape I use for my Zucchini sweet pickles, but I cut them rather thin.


If you want to grill, cut 1/2 inch thick planks.

This is a great way to use the really large zucchini you get later in the season.

Sticks of zucchini

These 1/2 inch by 3/4 inch sticks or spears are great if you are making pickles, or veggie fries.  This is also a sturdy shape for deep frying.

If you have a mandoline you can cut your zucchini in Julienne strips.

This is great in salads raw or steamed and used in or as a side dish.  This is also a great way to reduce the tough tooth feel of an older more mature zucchini so you can use it in a stir fry or saute.

A potato peeler can let you shave off ribbons of zucchini.

This will help avoid the seedy center in larger fruits.  You can then take these thin pieces and marinade them in lemon juice and olive oil to make a vegetarian carpaccio or steam them to craft a zucchini fettuccine.

Carpaccio is a rare beef dish that uses thin slices of meat served over arugula and spinach with shaved parmesean cheese.  You can simply substitute the the zucchini for the beef and drizzle lemon juice and olive oil over it all and sprinkle with fresh pepper and serve. Or you can use your favorite vinaigrette.


Monday, August 25, 2014

Weekly update -- August 24

On August 21 we had two days (24 to 48 hours) of rain. Here is a map of the rainfall totals as of 7 Am on the 22nd. We are in the purple area near the top of the map with 2.51 inches of rain average, but in Elmhurst it was amazing the amount of rain that came from several different storms.

Courtesy of NOAA.gov
A press release from the City of Elmhurst stated this:

The City of Elmhurst experienced a significant rain event beginning Thursday, Aug. 21, and
continuing through the overnight hours into Friday, Aug. 22. Real-time data from the United States Geological Survey reveals several heavy bursts; 0.31 inches in 10 minutes just before midnight; 1.19 inches in approximately 30 minutes just after midnight; 0.26 inches in 10 minutes at 1:15 a.m.; and .42 inches in 20 minutes at approximately 2 a.m.

A total of 4 inches of rain fell in northern Elmhrust, where the garden is (only 2 inches down were I live.)

The roads to the garden were flooded and I expect that the garden itself was under water. I could not go see for myself as the roads to it were shut down.   The railroad tracks however, would act as a barrier keeping the rain in the lower area to the north of the tracks which is where the garden is located.

taken with my cell phone so not as clear but you can see the darkened earth from the rain

Lots of tomatoes, but nothing ripe because it is not that warm.  The rain is not making the tomatoes happy.  They may die from too much moisture.


When I was finally able to visit on August 23rd you could see the mud and dirt in the garden paths showed that a river must have run through the garden area.  It was too wet to walk even on the paths and I became a muddy mess just trying to harvest a few zinnias for the garden club competition.

Because of the rain, the weed population, especially in the back garden area around the squash and beans, has more than doubled.  Some of the weeds are taller than the squash and melons.  You can see the yellowish fruit about int he middle of the last photo.  That is the only melon so far on the musk melon plant, but with all this rain I am not sure the powdery mildew problem will be going away at all.

The peas were about to give us a second crop, but I think they are going to die back instead because of the wet ground.  The beans both bush and heirloom climbing beans seem to be faring well, but I could not harvest them  for fear of ruining the soil around them.

All I did was cut my zinnias.

You can see the remnants of the river in the path to the right but the broccoli rabe and hot peppers seem to be doing well despite the soaking.

I did not stay very long, as I was sinking into the ground everywhere I stepped both in the grass around the patch and on the garden paths too.

Monday, August 18, 2014

Weekly update - August 17

This week we continued to weed and harvest and water a bit, but there has been plenty of rain here recently, almost too much.  Everything is still looking very green and the tomatoes are ripening as we have had some warmer nights.
Looking to the east
Things are still very contained, even the herbs are staying somewhat separated from each other.

Looking to the west

The Kohlrabi I used to replace the lettuce is growing well.  If the small bugs that are eating the leaves on everything don't get tot them they should do rather well and give me a late September root crop.  Since we never planted carrots because we ran out of room this will be a nice item to go with the Celery root (Celeriac) that will mature around the same time.


The Zinnias were the happiest of plants int he garden this week.  As you can see they are covered with blooms.

The Calendula that I planted from seed along the front edge of the garden late in the season has come up well and is going into continuous bloom mode.  As soon as I clip off a flower others come to take there place.  This mix has two shades of lowers An orange that is like a pumpkin color and a red and yellow that looks almost like a straw flower.  So far not a single yellow bloom in the bunch.


I have so many calendula about to pop that I think I will need to plan to use them this fall in something special at the Backyard Patch.

The dwarf sunflowers are flowering and the heads are getting heavy and turning toward the ground.

My sunflowers are only about 2 feet tall.  But a few of the other gardeners in the community patch has full-sized sunflowers like these beauties.


There are signs of trouble in the garden however. Here is the climbing burpless cucumber vine and you can see the bug holes in the leaves and the dried and discolored leaves on the plant.  I am not sure if it is vertasiliam wilt, which I know is in the soil or the fungus from the potato bugs that I know have been plaguing these plants since they got about 2 inches tall.  Either way the bugs and diseases are winning.

Musk Melon


A mold called powdery mildew, has also formed on all the squash plants including the acorn squash and the zucchini.

After the great harvest we had previously the plant now struggles to produce one zucchini at a time.

My melon which was slow to germinate and slow to prosper is covered with this same powdery mildew.

Acorn Squash also has yellowing and drying leaves


Zucchini
 The herbs, however, are doing very well.  The thyme is in need of harvesting, but I forgot the paper bags, so I will do it next time I visit. The Dill and fennel have already started to produce seed.  I have decided to let them go to seed as I have other plants so I can save the seed for next year as I will lose all these plants at the end of the season when the community garden shuts down. Even after harvesting them last week they have grown and filled back in like they were hardly cut.

Silver thyme

Looking to the east (rather bright because of sun angle at 8 PM)

Looking to the west Mint int he foreground trimmed back so you can see the tri color sage.
In the next few weeks I will harvest these again, allowing some of the calendula as well as the bronze fennel go to seed and perhaps the oregano and savory as well so I can save the seed from those plants which did very well this season.