Tuesday, June 2, 2015

The Planted Community Garden - Sunday May 24, 2015

This year we suffered from over-purchase syndrome.  That affliction where you buy more plants than will fit in your space.  That linked with the fact the plot at the end is actually smaller than it is supposed to be, something I had not planned for, made our original plan will not work out quite right.


Here is the plot, a bit weedy due to the fact we did not come out until May 24, due to the days of rain. We first removed the grass and used the hand tiller to break up the soil and remove the large weeds from the garden edge.


You can see the hand tiller to the left in this picture.  It is a pole with three curved claws at the bottom.  You place it in the ground and twist and it brings out weeds and breaks up soil.  You can see the original plan I posted back on May. I put in the paths and measured off the garden and that was when I discovered the the plan was not going to work.


We were not able to put in three long beds and two short, instead we got two long beds on the sides and three short beds down the middle  We planted tomatoes in one long bed as planned but it was shorter than it should have been so all the plants did not fit and we had to put the plants a bit closer together.

We purchased too many peppers and planted them into two beds leaving us with only one small bed for everything else and one long bed for the herbs.  I think I am going to have to sacrifice at least part of the herb bed for more vegetables, as the kohlrabi, broccoli, beans and squash cannot possibly fit in the last bed.  We lost the time for growing lettuce because of the heavy rains in May so we will try that experiment later in the season.


I will be growing some of the herbs in containers and will be planting onions and shallots in between the peppers. I will need to wait until the first week of June as it rained for five days straight starting with the evening of the day we planted these plants.  That rain and the effect of cold weather on the plants will be covered next week.

Why to get or use a Community Garden or a Patio Garden?

This year the drought in California is becoming acute.  80% of the water in California is used for agriculture.  That means if the shortages continue, our food prices for produce, almonds, strawberries, citrus and vegetables will continue to increase.  We cannot do anything about some food which we cannot grow easily in the Midwest, but there is no reason we cannot grow vegetables and herbs for our own use and perhaps enough surplus to can and preserve for winter use.


In fact it is possible that even if we are just buying produce from local farmers at the farmer’s market we can extend our food budget and improve the quality of our daily meals.  This blog will give recipes for using and preserving your produce as well as ideas for growing your own food, even if it is only one plant in a pot on the patio.


Let’s start with patio containers


If you want a quick garden use a container.  You can use any size container and just about anything as the container.  Some people with an outdoor patio use a half barrel.

Herbs in a cement container
Others use a wash tub or terracotta pots or other decorative containers one can get at the hardware store or home center. However you can also use coffee cans, milk cartons, salvaged containers that were never originally intended to be used for gardening.

Strawberry Pot
Washtub
One of the best containers to use for herbs if you are short on space is a strawberry planter.  You can find these at your local gardening center. They are usually made of terra cotta and have many small openings around the sides for your smaller herbs. You can plant the larger herbs at the top.

It is possible to keep an entire culinary herb garden conveniently located right outside your door in one strawberry planter. Some good choices of herbs for this would be: oregano, thyme, curly parsley, lemon verbena, chives, and basil.

The key with any container is a good potting soil and great drainage.  Before adding soil to your chosen container, you will need to provide a layer of rocks, gravel or Styrofoam pellets to the bottom quarter of the container to help with the drainage process. Broken chips from terra cotta pots also work nicely for this. If you are planning on bringing an outdoor container of herbs indoors during the winter months, I would suggest the use of the Styrofoam pellets to keep the weight down.

Use a good quality potting soil mix to fill your container to within two inches from the top to allow plenty of space for watering. Few herbs require a large amount of fertilization, but nearly all vegetables will require some fertilizer during the growing season, especially if kept in pots.

Keep your container garden well-watered, as they will dry out more rapidly than those that have been planted directly into the garden.


raised beds
Having a Garden Plot

Many communities have plots available for rental and sometimes even for free or for volunteer service. Near me there are garden plots available from the Elmhurst Park District, which is where I rent mine.  In nearby Berkeley, IL they just started a Community Garden Club in 2013. They rent plots and offer information for beginning gardeners.  I found a listing on the DuPage County website pulled together for the Cool Cities Initiative that lists all the public gardens and the rent-able plots in the county.  You can find it HERE.

The nice thing about a community plot is you have a set space, prepared soil and access to water most of the time. The bad thing about a community garden is that the soil can be depleted and the instance of diseases can be increased. But for those like me, who live in an apartment or a condo it is a great place to grow vegetables when you only have a small patio space.

In some cases community gardens are just prepared soil and in other cases they are raised beds.

Elmhurst Garden Plots
These are the Elmhurst plots, three rows about 300 feet long, each 20 feet wide with two shorter rows at the far end of this picture about  100 feet long, again 20 feet wide. They have grass inbetween the rows and two well attachment areas.

This is a raised bed garden in Sheboygan, WI built into a small corner lot that has a strong slope.  Populated with several raised beds, it takes advantage of the land in ways not much else could.  They have water and a tool box provided.  There are two compost bins making soil from last years leavings  I was amused, rather than numbering the beds, they named them after flowers, like bluebell, lily, etc.

Raised bed garden
 You can tell they are allowed to keep the same plots year after year and unlike Elmhurst, where nothing can remain from one season to another, they have customized them with art and perennial plantings.  These photos were taken in May so not many new plants have been added as it was too early.

Compost bins

water and tool chest and benches
These small bins no more than 8 feet by 4 feet.  Enough for a a dozen plants which can produce produce for a small family easily and not require too much work.  We also found other rented plots in Sheboygan with slightly larger spaces.  Fenced and also including a compost bin.  That is something lacking at our gardens in Elmhurst.

Wednesday, May 20, 2015

Garden Help Links

So where do you go for help when the garden is not so perfect?

The first place I always go when there is a problem with the garden is the Master Gardener program.  Almost every state has a program of some sort.  Here in Illinois it is run through the Cooperative Extension agency of the University of Illinois.  No matter what state you are in they are a great resource for home growers, since they are run through a local university they will have nailed down growing issues for your area and some solutions to many garden problems.  They are also great for plant identification, when you do not know if something is a weed or plant to keep.

The Uof I master gardeners has a website that I recommend as a resource.  They had tons of articles on all sorts of topics under Hort links on the webpage. They also produce a digital newsletter for Master Gardeners that you do not have to be a Master Gardener to read.  It has book reviews, articles about various Master Gardener program events and other useful information.  The events link has programs that can be used for Master Gardner Continuing Education, but if you are not a beginning gardener, I suggest checking out a few of these, they have wonderful details.  But if you are new to gardening, you may find them over your head, so start with the Hort Links first.
 
courtesy of mikenowak.net
Also in Chicagoland we have Mike Nowak, a radio personality who is a go-to source for gardening info.  His website also has great information and links to even more!  He is doing his show as a podcast presently and the website has links to listen to a wide assortment of recent shows.  You can also catch him regularly and repeated on the GDGD Radio Network available in an app for your phone.  You can find the link to download the App on his website as well.

Then you can try a local botanical garden or arboretum.  They are always thrilled to help those curious about growing things.  Where I live we have the Chicago Botanic Garden in Glencoe and the Morton Arboretum in Lisle.  

Sensory Garden at the Chicago Botanic Garden

Master gardeners and plant horticulturalists work at the Botanic Garden in the Plant Information Center to help ID plants and insects as well as plant diseases.  You can access them online as well as in person from 10 a.m. – 4 p.m. Monday – Friday; Noon – 4 p.m. Saturday & Sunday, but they are closed on holidays. 

Children's Garden At Morton Arboretum
At Morton Arboretum they have a Plant Clinic They accept walk-in questions April through October, from 10 a.m. to 4 p.m. Monday through Saturday and November through March, it is open from 11 a.m. to 3 p.m. Monday through Friday. You can also contact them via email through their website. In addition to identification, the plant clinic staff can help visitors choose landscape plants by directing them to specimens in the Arboretum so they can answer the age old question - how big will this get?

Also if you want to share and learn and search using your phone in a social media setting, I have a wonderful somewhat new app you can download called GrowIt!  You can get this for your android or iPhone.  And it is all about local growing connections.  You can connect with gardeners near you.  What are they growing?  Will it grow at your home? It eliminates that wonderful plant you saw on Pinterest that only grows in a subtropical climate because you know the information you are getting and sharing is local to your area or zone.  

As their website says: "Don’t know what flowers to plant in that container on your patio? GrowIt!™ is here to help you out. Find out what people are planting in your area. GrowIt!™ lets you Garden Socially. Whether you want to show off your plants, or find something that will work in your garden; GrowIt!™ has something for every type of gardener."

This app is new and growing and changing and updating and everytime I use it I like it even more.  So if you are on the app say hello to Backyard Patch Herbs and you will be chatting with me!  This is a great way to share all those great garden photos you take with your phone with people who also love garden plants!

Sunday, May 17, 2015

Starting the Community Garden in 2015

Last year the weather and problems in the soil made the success of our garden less than stellar.  We realized that the soil itself has not experienced proper crop rotation which resulted in more diseases in the soil, especially fungus which is not killed by cold weather.  The cold spring slowed plant growth and caused an increase in the bug population resulting in more of the problems associated with those bugs including other diseases.  And then we had heavy rain and flooding late in the season that ended the tomato plants producing the anything,

I also made several mistakes including not removing the lettuce crops once the weather got warm.  They crowded and took over a number of other plants.  And planting a couple of plants too soon or too late exposing them to soil and weather problems. We scouted the community gardens last year and chose this year’s location by the fact no one grew anything in it last year.  It at the end of the garden, farthest from the water source which should be a frustration later, but we think we have a better chance of not exposing ourselves to crop failure like last year.


Mustard seeds

That scruffy patch in the center below the bean trellis is salad greens going to seed.


The plants that did the best last year were the herbs, but when the season ended and I pulled the plants I liked, they were all so entrenched in the soil that the root shock and the quick winter we experienced resulted in them not making it when repotted them.  This year some of them will be planted inside large buried plastic containers to make pulling them out at the end of the season easier.
This year we are also going to experiment with several growing methods that may allow us to work around the fact that the garden spaces have soil issues.  It is possible that this is the last year for this location and that next year the gardens will be relocated salving this problem but if not these experiments may help others grow more here.

The Design

This is the preliminary plan for the garden.  It is on the end so I have three open sides rather than two like last year.  I have decided to place three beds along these edges which will be easy to reach and weed without having to walk or kneel in the paths.


I may change the layout and place the tomatoes on the interior as they are more easily weeded with a hoe and can be reached from narrow paths.

The new experimental methods

Planting in a soil bag
I found this on the internet for people who don’t have time to remove sod or do not have much yard to work with or a very poor soil.  But buy a bag of soil, lay it on the ground and cut a rectangular hole from the top and plant directly into the soil.  It is good for items liking a more shallow planting soil, like lettuce and greens and a couple other plants.

Straw Bale Gardening
Another method I want to try is straw bale gardening.  It is said to work very well for tomatoes and so we are going to try at least two bales and plant tomatoes in them. The bales are set on the ground and you create a soil in a hole in the bale by adding compost and soil.  The straw breaks down adding organic matter to the soil as the plant roots burrow into it.
thyme bed in August 2014

Containers on the soil and raised beds
Last year I experimented with a raised bed in the garden, but I filled it with soil from the garden that I dug out of the paths.  Although it did fine planted with thyme, the thyme did not exactly flourish as it probably should have.  So this year I plan to create at least one raised bed and fill it with sterile soil I bring in. I think I will also experiment with large recycled containers that I am going to get at garage sales and such and place those in the garden.  I plan to look for at least one wash tub deep enough to grow root parsley and carrots and radishes in.

This year it is again cold.  Way too cold to plant even if we could get an early start.  The garden opens on May 1, but I think we may wait until at least the 24th to plant anything.  The Men’s Garden Club of Villa Park is having their annual plant sale, themed Heirlooms and Herbs, just before Mother’s Day, so we will be getting most of our plants at that sale on May 8 & 9 The following weekend I am in Geneva for Gardenology where I will have my herb creations for sale and will be presenting programs on herbs.

That left May 17 as the soonest day to start planting, however heavy rain on the 16th and more rain expected on the 17th made me leery to compress the soil, so I am going to wait until Memorial Day Weekend.  I remember a year we had frost on Memorial Day after I planted all my herbs that Saturday.  Could this year be like that??


Saturday, February 14, 2015

Saved Seed

One good thing to come from last year's garden was the bean harvest was not large enough to eat, but the seed harvest from those same beans was good enough to replenish next year's garden.

This is the tray full of seeds and pods that I shelled this week.


I grew a couple of heirloom beans: Christmas Beans and Tiger Stripe Beans.  they are quite lovely to look at.  I am told they make great soup, but that I am hoping will be part of my experiment for this year.


We are getting a new plot, but we are going to try for one that was unused last year so the ground was fallow and the diseases may be less prevalent.  We will have to go through the lottery for this but it will be worth it to move from the patch with too much disease.

The gardens will not be moved this year, probably because the Park District did not vote yet on giving the land to the City of Elmhurst, but I have not followed the papers much this winter and the Website for the Park District is not the easiest to navigate.

In addition to the heirloom beans, I saved herticote vert (thin green bean) seeds as well as sweet pea seeds.  I got the original sweet peas from Seed Savers so I know that I can save the seed and use it this year it was not a hybrid.

I was unable to save melon seed because the plant never gave a viable fruit, but I do have some seed left from last year and I may try to use that and see what happens.  Much seed is only good for a year after harvest and I have to check to see if Melon falls into the category.

It was easy to shell dried beans.  The seed coat split open easily allowing access to the seed.  The hardest to harvest were the green beans as the coat shrank as it dried gripping the seed tightly.  I had to smash the coat between my fingers to extract the seed.

Since all of these beans were harvested in September they were quite dry and most had opened before I even began shelling.

For now I have placed them in seed envelopes I made myself.  I got the seed packet template from a vendor on Etsy.  I just print them in various sizes, cut and glue them.  Then I label and stuff them with seeds.  I use the smallest ones for herb seeds mostly.  The package size is about 1 1/2 inches square and I place them inside greeting cards.


The packet has room on the back for growing info, like sunny and seed depth for growing, etc.  For these I transferred the information from my garden journal from last year.  Now I remember why I kept that journal with all the info about the plan and the planting!  Over the winter months I created my own colorful garden journal filled with pictures from my gardens and you can get a digital copy on Etsy.

Sunday, January 11, 2015

Garden Wrap up 2014

The garden plot failed in 2014!

There is no other way to say it.  Except for the herbs which flourished until frost all the other plants in the garden were dead by the end of September.

the row of dead plants to the left are my neighbors dead sunflowers on 9-31-14
That collection of green in the middle is lettuce that reseeded in the space where the tomatoes used to be.
The creeping death moved from one plant to another and without fail turned even the healthiest plants into brown shriveled dead non-growing things.

I was unwilling to admit this and never quite finished the posts from late September that documented this death. But I have located all the photos and will update those posts in the next few weeks so others can scroll through and see what happened.

It is my opinion, based on the types of plant death that occurred and the fact that the herbs were mostly unaffected by this problem, that the soil was to blame for the issues.  The soil may have had plenty of nutrients or not, I did not have it tested once the plants started dying from diseases that were not soil quality related.  The soil was littered with several identifiable bacteria.  Check out my post on what was wrong with the tomatoes to see what I mean.

The garden plots have been traded to the City of Elmhurst to use for flood retention so will not be used in the coming year.  It is assumed we will get new areas to plant in for 2015, but I have not been informed of any locations as yet.  I am pleased that these plots are not to be used again as they were too far gone to repair and would have had to have been left fallow for a couple of years to start any possibility of repairing the soil and killing off the bacteria in the soil.

What I wanted to be able to do in 2014 was raise enough vegetables to freeze and can and be able to use them all winter and post about the process of preserving the vegetables.  However, there was never enough harvest to go beyond our personal use for the days following a harvest.  The herbs were very prolific and showed no sign of disease and I am still using the herbs I dried from the community patch.  Herbs are generally resistant to soil borne illnesses so their success only reinforced my belief that the soil was healthy in nutrients but also rampant with bacteria.

What I did learn and want to pass on as an important note is that if you have a community plot and are hoping to grow old-fashioned heirloom varieties of plants, you may want to reconsider.  Many hybrid plants were hybridized to make them more resistant to diseases that occur naturally in the soil and are hard to remove.  As a result they would have been much more resistant to the diseases that eventually killed the plants.  We grew a couple of hybrid peppers and those were the last plants to die in the garden.

jalapenos still producing on 9-31-14
The cucumber was the most damaged by soil issues and the sheer number of bugs the garden had because of the previous winter.  Squash and melon, all grown from heirloom seed, were the first to show signs of problems.

The various beans did okay but did not continue to produce after an initial harvest.  We were able to save enough seed that we can probably grow more next year.  The tomatoes were slow and had damaged fruit, but probably would have lived longer and produced more except for the incredibly wet weather we experienced.  The soil was not dry enough for them and their root systems and they eventfully rotted from the bottom up.

dead sunflowers
The sunflowers just died within days of reaching flowering stage.  They were beautiful one week and dead the next.

The zinnias, grown from seed, did very well, but the bugs did make finding a perfect bloom hard.  The dahlias never flowered.  The calendula, however, flowered until frost and I harvested hundreds of petals to use in tea.
The yellow flowers along the front are calenula

Sunday, November 9, 2014

Celeriac Gratin a Thanksgiving Recipe

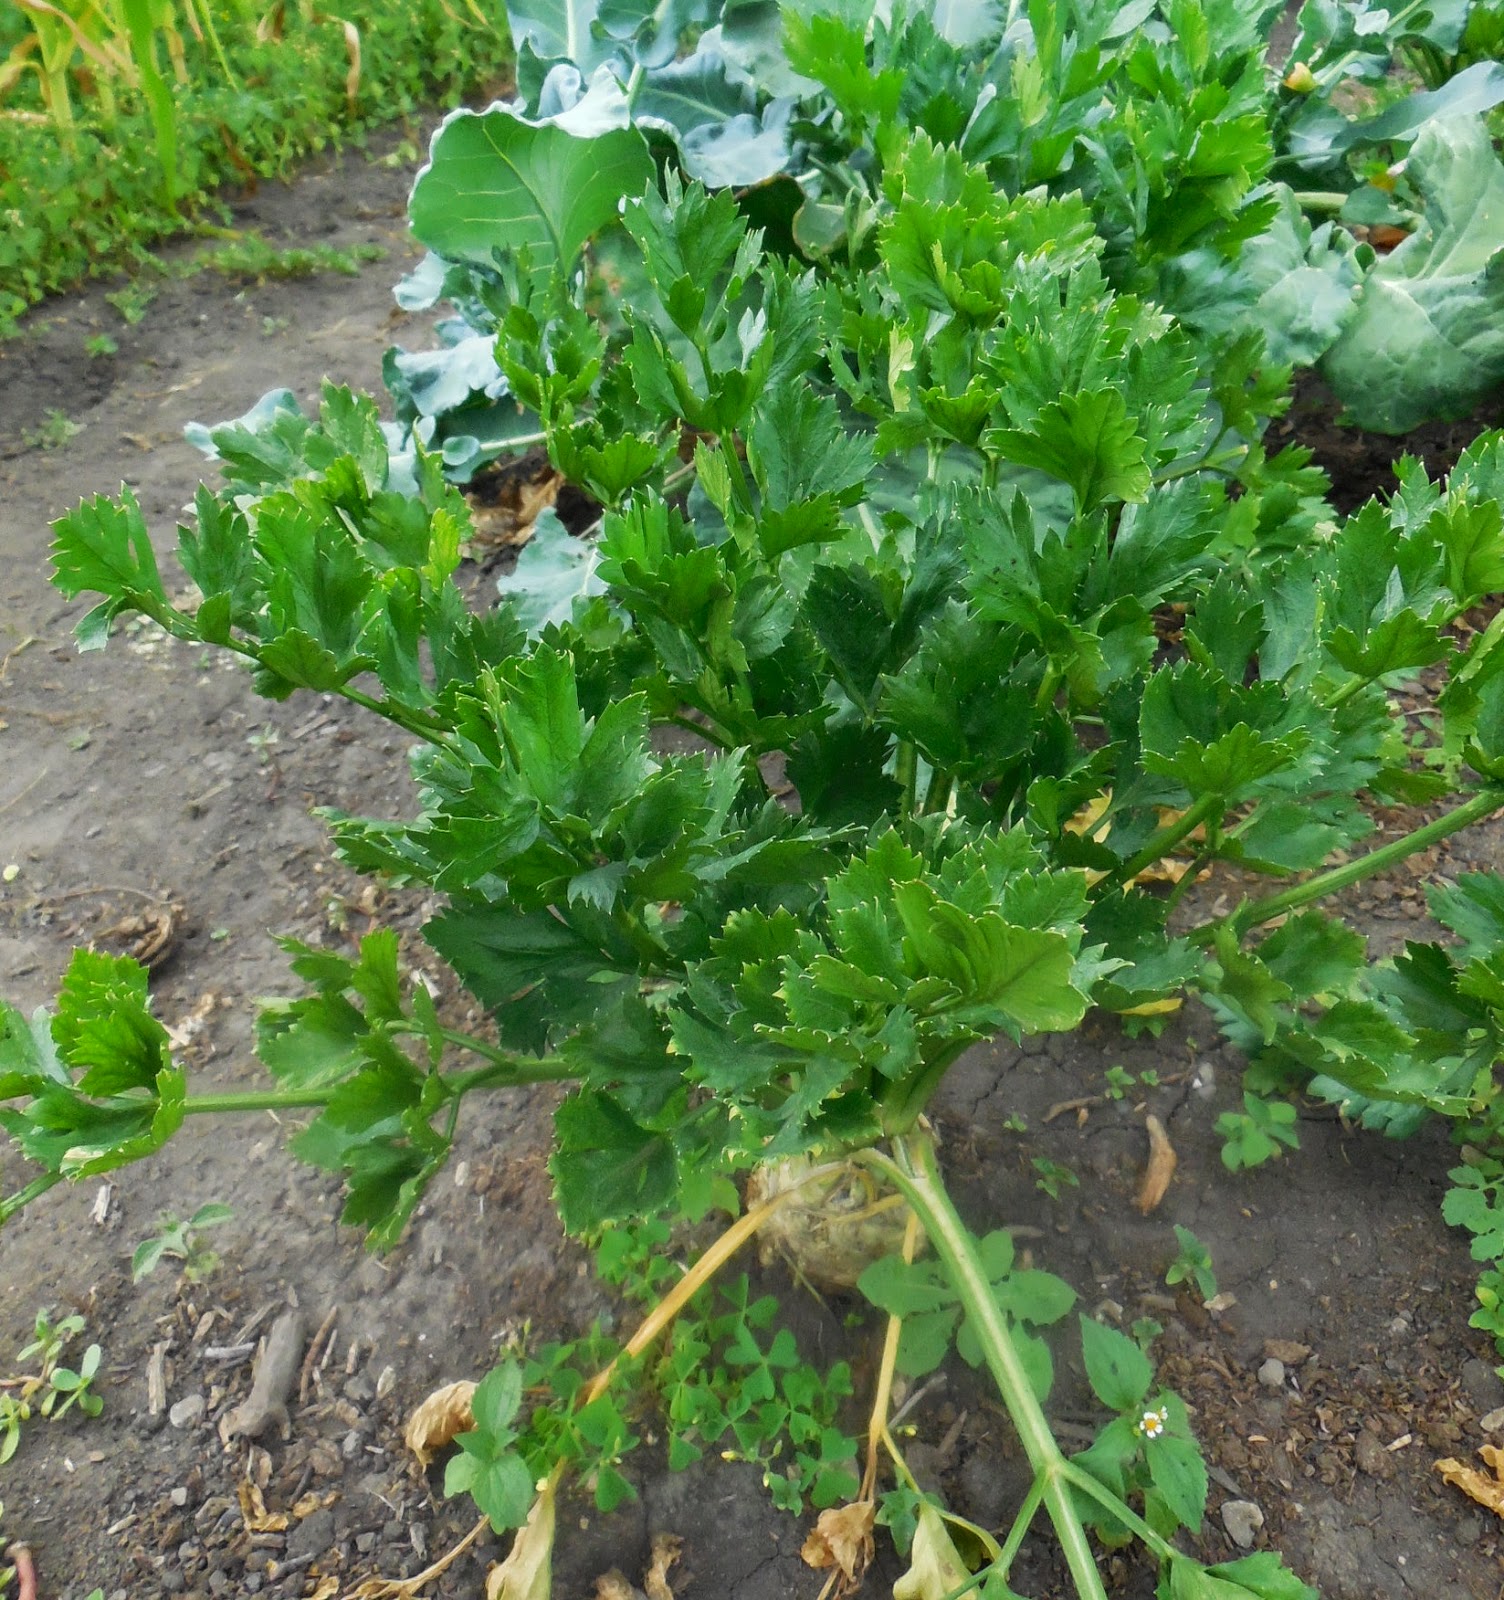
One of the plants I grew this season for the first time was Celeriac or celery root.  It was easy to grow, you plant it and forget about it and harvest int he fall.

It was totally bug resistant, grew well and needed watering only occasionally.

You can see the leaves and bulb in this early August 2014 photo
I would recommend it.  I even harvested the leaves from it to put in soups and stews and sauces and that was good too, even though the books said it might not be.

Leaves, photo taken in late July 2014
This is a recipe I found that we tried with the last two roots we harvested just before the first frost in late October 2014. (Full recipe at the bottom of the post!)

First step was to soften the peeled Celeriac which was done by simmering it in chicken broth and cream for about 30 minutes until the celeriac was tender.

After that the bulbs were cut into potato-like slices to go into the casserole dish.
 Now place the slices in the casserole with the thyme.
Bring the sauce to a boil and add the other ingredients to it.  Simmer for a bit then place it over the prepared celery root.  Do not worry if it looks like soup over the root it is supposed to.

Now grate the cheese.  We used a small food processor, but you can also do it by hand with a grater.


 Spread the Cheese over the prepared root in the casserole and bake for about 30 to 40 minutes, until the cheese has browned the the sauce is burbling.
 

What you get is a rich side dish, without the heavy starch flavor of potatoes.  It was perfect with the pork chops we had for dinner that night and with the nut crusted chicken breast we had the next night.  The cooking in the broth made the root soft and tasty and not tough.  This is a dish you could serve at Thanksgiving without any complaints!

Celeriac Gratin
  • 1 cup chicken broth
  • 2 cups heavy cream
  • 2 large celery roots (celeriac bulbs)
  • 2 tablespoons whole-grain Dijon mustard
  • 1 teaspoon sea salt
  • Freshly ground pepper, to taste
  • 1 teaspoon fresh thyme leaves
  • 1 cup finely grated Gruyere cheese

Directions:
In a large pot, bring vegetable broth and cream to a simmer. Trim the ends of your celeriac and use a sharp knife to peel the bulb. (Don't bother with a vegetable peeler, the tough skin needs something sharper.) When the bulbs are peeled, quarter each bulb, lengthwise. Add celeriac to the pot of simmering liquid. Cover and cook, turning occasionally, until the celeriac is tender (about 30 mins).

Heat oven to 350 degrees.  Remove pot from heat. Use a slotted spoon to transfer celeriac pieces to a large cutting board. When cool enough to handle, slice the celeriac into 1/4-inch-thick slices.

Layer the sliced celeriac in the bottom of an ungreased baking dish. Worry some over creating a pretty design, but not too much. Sprinkle with fresh thyme leaves. Bring the liquid remaining in the pot to a boil (watching carefully to make sure it doesn't boil over). As the liquid thickens, add mustard, salt, and pepper to taste. Pour the mixture over the layered celeriac, covering completely (if it looks soupy, all the better). Sprinkle the cheese evenly over the top, covering completely. Garnish with a sprig or two of thyme and bake for from 35 to 40 minutes, until the liquid is burbling and the cheese has turned richly golden-brown. Serve hot.


Notes: You can substitute a rich vegetable broth instead of chicken broth. Cooking the celeriac in the broth prior to baking gives it a rich flavor and ensures that the root vegetable won't be tough or stringy after baking.