Monday, August 18, 2014

Weekly update - August 17

This week we continued to weed and harvest and water a bit, but there has been plenty of rain here recently, almost too much.  Everything is still looking very green and the tomatoes are ripening as we have had some warmer nights.
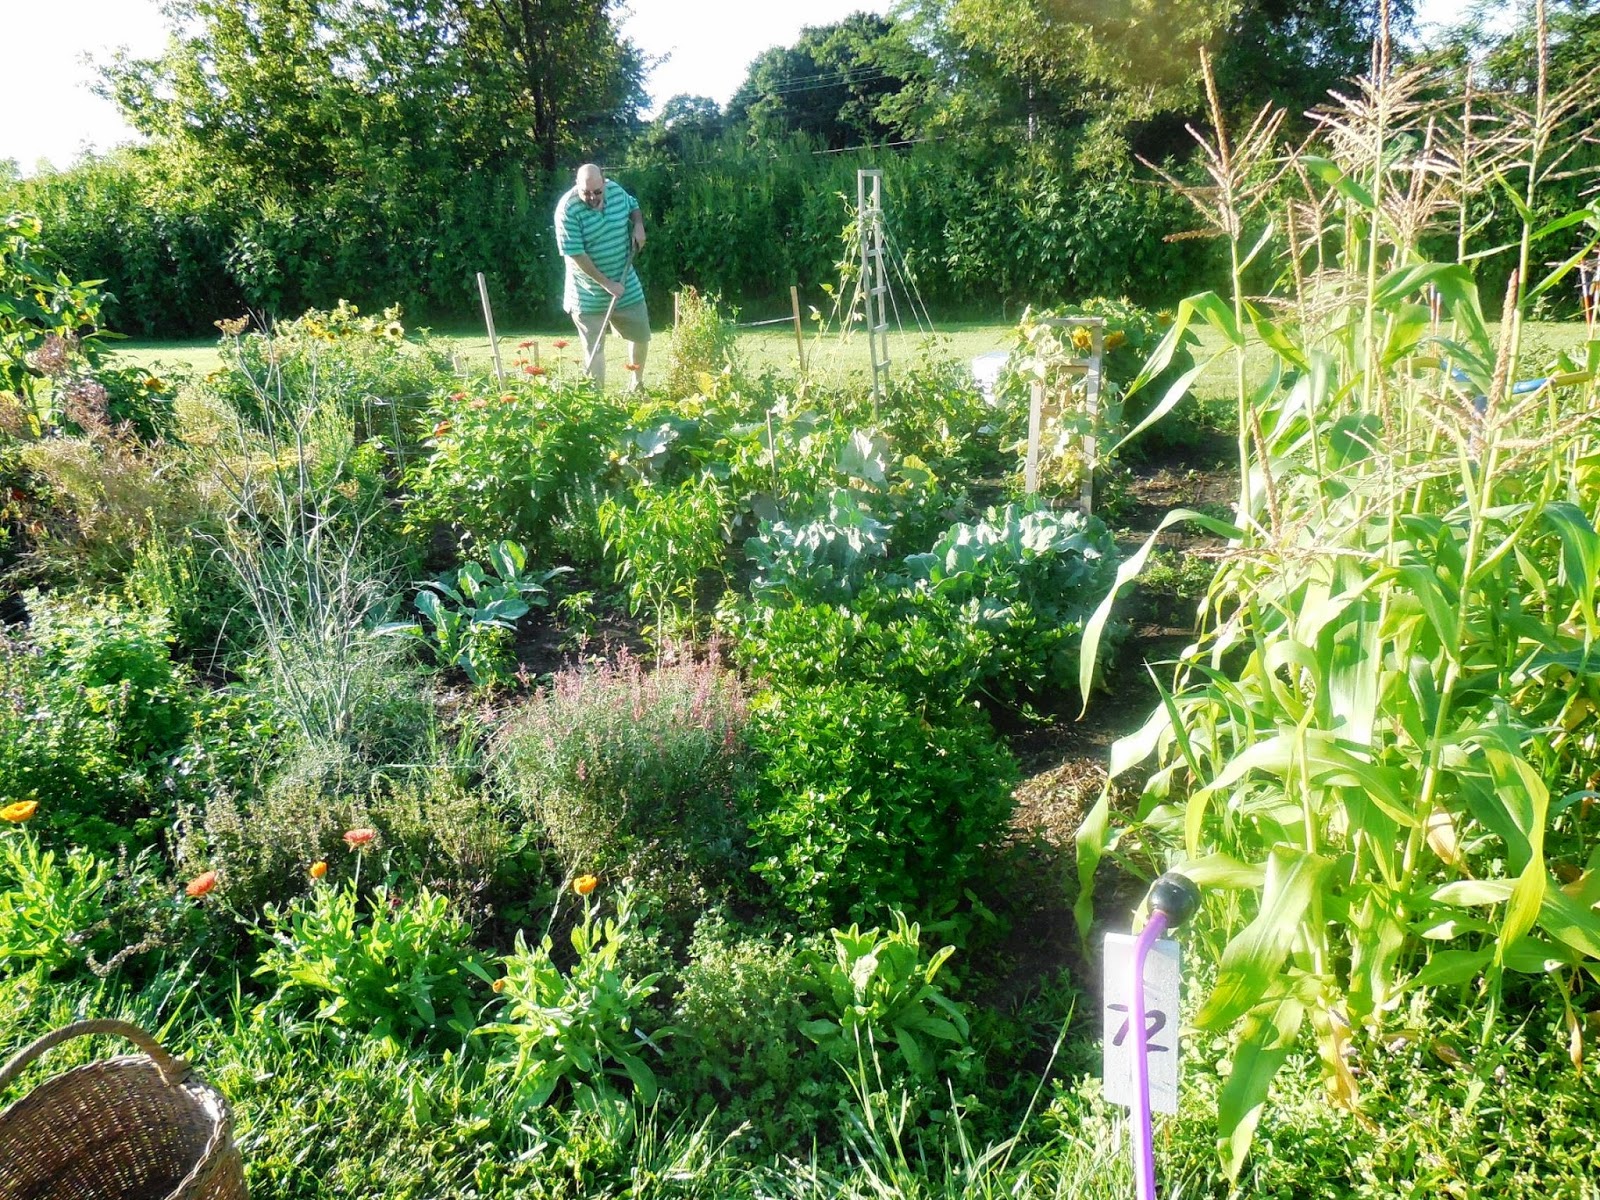
Looking to the east
Things are still very contained, even the herbs are staying somewhat separated from each other.

Looking to the west

The Kohlrabi I used to replace the lettuce is growing well.  If the small bugs that are eating the leaves on everything don't get tot them they should do rather well and give me a late September root crop.  Since we never planted carrots because we ran out of room this will be a nice item to go with the Celery root (Celeriac) that will mature around the same time.


The Zinnias were the happiest of plants int he garden this week.  As you can see they are covered with blooms.

The Calendula that I planted from seed along the front edge of the garden late in the season has come up well and is going into continuous bloom mode.  As soon as I clip off a flower others come to take there place.  This mix has two shades of lowers An orange that is like a pumpkin color and a red and yellow that looks almost like a straw flower.  So far not a single yellow bloom in the bunch.


I have so many calendula about to pop that I think I will need to plan to use them this fall in something special at the Backyard Patch.

The dwarf sunflowers are flowering and the heads are getting heavy and turning toward the ground.

My sunflowers are only about 2 feet tall.  But a few of the other gardeners in the community patch has full-sized sunflowers like these beauties.


There are signs of trouble in the garden however. Here is the climbing burpless cucumber vine and you can see the bug holes in the leaves and the dried and discolored leaves on the plant.  I am not sure if it is vertasiliam wilt, which I know is in the soil or the fungus from the potato bugs that I know have been plaguing these plants since they got about 2 inches tall.  Either way the bugs and diseases are winning.

Musk Melon


A mold called powdery mildew, has also formed on all the squash plants including the acorn squash and the zucchini.

After the great harvest we had previously the plant now struggles to produce one zucchini at a time.

My melon which was slow to germinate and slow to prosper is covered with this same powdery mildew.

Acorn Squash also has yellowing and drying leaves


Zucchini
 The herbs, however, are doing very well.  The thyme is in need of harvesting, but I forgot the paper bags, so I will do it next time I visit. The Dill and fennel have already started to produce seed.  I have decided to let them go to seed as I have other plants so I can save the seed for next year as I will lose all these plants at the end of the season when the community garden shuts down. Even after harvesting them last week they have grown and filled back in like they were hardly cut.

Silver thyme

Looking to the east (rather bright because of sun angle at 8 PM)

Looking to the west Mint int he foreground trimmed back so you can see the tri color sage.
In the next few weeks I will harvest these again, allowing some of the calendula as well as the bronze fennel go to seed and perhaps the oregano and savory as well so I can save the seed from those plants which did very well this season.

Thursday, August 14, 2014

Weekly update - August 11 Preserving Herbs

This week in the garden we were weeding and harvesting herbs.  There were some other vegetables, but with cooler nights they are growing more slowly, while the herbs were enjoying the extra rain and some previous trimming to sprout out with lots of new growth.


You can see how the herbs have spread and grown together.  In a couple of cases you have to move one plant aside to see another.

The tomatoes are still producing, but not has fast or as much as we would like.

The sunflower blooms have finally begun to open. and the Zinnias are blooming in a riot.

These are a dwarf variety that stands no more than 3 feet tall, so you look down at, rather than up at the blooms.


The calendula I planted from seed late in the spring is reaching blooming stage.  The first flower appeared this week.  Considering I kneeled on them and raked them when they were seedlings, forgetting I planted them along the front edge of the garden, they are doing rather well.

We needed to tie up the grape and cherry tomatoes as the branches have outgrown the first two sets of ties.


The Kohlrabi is moving beyond leafy branches to producing a bulb at the base.  They should be ready to harvest in late September.  They generally only need 8 weeks of growth to be able to harvest so we might actually be able to dig them sooner.

The broccoli rabe is still producing.  And we got one large zucchini this week to add the mountain of them from last week.

After surveying the garden I decided that while hubby watered I could get most of the herbs  harvested which would set the plants up for even better harvest in the next few weeks.

Once I cut herbs and brought them home I found that there were stowaways on the fennel.  This Swallowtail butterfly caterpillar came home with me.  I gave him the fennel and we will see if he becomes a butterfly!


Harvesting  / Preserving Herbs

Here is the harvesting basket this week.  The tomatoes and zucchini are on the bottom and then I filled in over them with herbs.  Since next week I will cut a few sunflowers, I thought this week I would cutthe zinnias for the vase int eh kitchen.


The dill went to seed weeks ago, due to the heat spell we had.  I did not do what I normally do with dill which is seed a row every two weeks to give me a continuous crop of dill weed.  I have that in the regualr herb garden so i just planted one plant here and decided I would harvest the seeds for pickling as they ripened.

Here is a photo identifying most of  the herbs in the basket.


I took the savory, mints and lemon balm and bundled them and hung them to dry.  You just pull of the leaves off the bottom of the stems, then bind the stems with a rubberband.  Then I loop the band over the arms or base of a hanger and hang them out of the sun in a place with good air circulation.

Always remember to label your herbs, because one plants looks the same as another once they are dry. (The herbs in front are lemon balm)

Here are the herbs after a week of drying (this is spearmint.)


I also dry herbs on trays of plates.  I have a plate stand (the kind you use for confections and tea service.  I place old plates on it and line them with paper towel.  I spread out the smaller herbs or loose leaves on those to dry.

Thyme with its tiny, thin stems cannot be bundled.  But it drys very easily, so I toss the thyme into a brown paper lunch bag with the variety of thyme written on the outside and stack them, open ends out to the room, on a shelf.  In a week the thyme is dry and I can transfer it to a jar and refill the paper bags.

Once you have dried the herbs until they crumble in your hand,  can take two weeks or more if it is humid, less if it is not. The you are ready to strip them from the stems and place them in storage jars.

fresh cut savory spread on towels on a plate

Dried savory ready to be stripped

stripped and ready for storage
In addition to drying the herbs for later use.  I also made some herbal vinegar.  This is one of the simplest and best ways to preserve the fresh herb flavors. There was not much tarragon, so I decided the best way to capture it was to craft a vinegar.  Tarragon is a great complement to wine vinegar.  With other herbs I use a plain distilled white vinegar.
tarragon in white wine vinegar
For details on how to make herbal vinegar, check out this how to post.

We also used some of the herbs fresh.  Here is a fruit salad with mojito mint ribbons.


Here is the herb garden and some of the other garden after we finished harvesting and weeding.  You can see how much more tame the herbs are now.


Saturday, August 9, 2014

Tomato Disease Issues in the Garden

As I have posted in the weekly updates we have several tomato issues in the garden.  I have been researching these issues and have come up with the following information.

GROWTH CRACKS

Growth cracks result from extremely rapid fruit growth. This may be brought on by periods of abundant rain and high temperatures, or can occur when water is suddenly available to the plant through rain or irrigation after a period of drought. Cracks may radiate from the stem end of the fruit or may encircle the fruit. Cracks are often invaded by secondary fungi and bacteria that further rot the fruit.

Maintaining even moisture by watering regularly and mulching the soil around the tomato plant can help reduce growth cracks. Varieties differ in susceptibility to cracking, and variety descriptions may be helpful in choosing a plant less likely to crack.  Heirloom tomatoes are most susceptible to growth cracks.  I still like them even though,due to our heavy rains, we have many growth cracks this year.

BLOSSOM END ROT

Among the problems we have seen with our tomatoes is blossom end rot.  This is very common among Roma tomatoes.   Affected fruit have a tan to black flattened spot at the blossom end of the fruit. Secondary fungi and bacteria can enter the blossom end rot area, resulting in further decay of the fruit. Blossom end rot can appear on fruit in any stage of development, but it is most common when fruit are one-third to one-half grown. The first fruit produced by the plant are often most severely affected. Fruit that develop later in the season on the same plant can be unaffected. I generally, in the past, ignored this problem unless it became so rampant that I did not get enough fruit.  I was warned that some people believed there were calcium problems in the soil of the Community Garden and the cause of blossom end rot is calcium deficiency in the tomato plant. Although blossom end rot means that the plant does not have enough calcium within the developing fruit, it does not mean that there is a lack of calcium in the soil. Often blossom end rot occurs as a result of several cultural or environmental factors that affect the plants ability to take up calcium. Fluctuations in soil moisture, heavy applications of nitrogen fertilizer, and injured roots can all predispose tomato plants to blossom end rot.


blossom-end-rot
Blossom end rot, M. Grabowski
The amount of calcium salt available to the plant decreases rapidly in the presence of excessive salts such as potassium, magnesium, ammonium, and sodium. Extreme fluctuation in moisture can also reduce the availability of calcium salts needed by the plant. Heavy applications of nitrogen fertilizers and abundant rain cause rapid and luxuriant plant growth and predispose the fruit to blossom-end rot, especially during periods of dry, hot weather.
Blossom-end rot can be minimized by maintaining a uniform supply of moisture through regular watering and soil mulches, applying fertilizer according to the results of a soil test, and avoiding root injury by not cultivating within 1 foot of the base of the plant.

Although we have blossom end rot on a few plants it is not wide spread and can be linked to the heavy rains we had so is not unexpected.  I just pick the damaged fruit and dispose of it.

VERTICILLIUM WILT
Probably verticillium wilt
However among the plants we have other symptoms such as spotted and dying leaves.  So my first thought was we might have Verticillium wilt.  This is a common fungus and I have seen it before in my herbs and my maple trees. The fungi causing this disease overwinter in the soil as mycelium or on plant debris as microsclerotia. The fungi infect a susceptible host through wounds in the roots caused by cultivation, nematodes (microscopic worms), or the formation of secondary roots. This disease is considered a cool-weather disease, developing between 65° and 83°F.  Since we had a very cool start to the season I thought this was a great disease to start with in my research.


verticillium wilt


Diseased plants often have only a portion of the plant wilting, such as one or two stems rather than the whole plant, but it will be a whole section of a plant, not a few leaves or branches.  The look of my tomato plants is a bit different than what is expected in Verticillium wilt.  However, my search here took we to other fungal diseases that lay dormant in the soil and that was when I discovered early blight.

EARLY BLIGHT


Early blight is a common tomato disease caused by the fungus Alternaria solani. It can affect almost all parts of the tomato plants, including the leaves, stems and fruits. The plants may not die, but they will be weakened and will set fewer tomatoes than normal. Early blight generally attacks older plants, but it can also occur on seedlings. Stressed plants or plants in poor health are especially susceptible. Early blight is also a problem with potatoes.

Symptoms: Dark spots with concentric rings develop on older leaves first. The surrounding leaf area may turn yellow. Affected leaves may die prematurely, exposing the fruits to sun scald.

Early Blight fungus overwinters in plant residue and is soil-borne. It can also come in on transplants. Remove affected plants and thoroughly clean fall garden debris. Wet weather and stressed plants increase likelihood of attack. Copper and/or sulfur sprays can prevent further development of the fungus. 

The best treatment for this is to rotate crops.  It can take 4 to 6 years to work out of the soil.  And it comes from infected plant material not being removed as well as coming in on seedlings and compost materials imported from other locations.  In other words all the ways people grow plants in a community garden increases the potential for this disease to be present.  There are no good ways to treat for this fungus in a home garden so the best treatment is disease resistant plants.  


Here is a list of some resistant plants: 

Aunt Ginny's Purple - Heirloom, indeterminate, beefsteak (16 oz.) 
Big Rainbow
 - Heirloom, indeterminate, bi-color beefsteak (16 oz.) 
Black Plum
 - Heirloom, indeterminate, plum (2 in.) 
Juliet
 - Hybrid, indeterminate, cherry (1 ounce) 
Legend
 - Open-pollinated, determinate, beefsteak (14-16 ounces) 
Manyel
 - Heirloom, indeterminate, yellow globe (8-10 ounces) 
Matt’s Wild Cherry
 - Heirloom, indeterminate, cherry (1/2 inch) 
Mountain Supreme
 - Hybrid, determinate, globe (6-8 oz.) 
Mountain Fresh Plus
 - Hybrid, determinate, globe (12 ounces) 
Old Brooks
 - Heirloom, indeterminate, globe (6-8 ounces) 
Tigerella
 (aka Mr. Stripey) - Heirloom, indeterminate, globe (4-6 oz.) 
Tommy Toe
 - Heirloom, indeterminate, cherry (1 inch)

Resources:
        Identifying Diseases of Vegetables, by MacNab, Sherf and Springer, Penn State, 1983 
   University of Minnesota Extension service website 
         http://www.extension.umn.edu/garden/yard-garden/vegetables/#tomatoes
Texas A&M Agrilife Extension website
      http://aggie-horticulture.tamu.edu/vegetable/problem-solvers/tomato-problem-solver/

Tuesday, August 5, 2014

weekly update - August 4 Art in the garden


Chas is always jumping in to water before I get any work done in the garden and this week was no exception.  We did not get much rain this week, so as a result the weeds are more tame.
looking from left to right

I was feeling rather artsy as I took pictures this week.  Besides there was no weeding to do so I had some time on my hands as he hogged the watering wand.  Here are a few close ups of the plants:

A single sunflower, but more are on the way!

Christmas Lima Bean pods, not beans yet
Zinnias (the flower of the Men's Garden Club of Villa Park)

Traditional Hyssop pollinators love it!
mustard seed

Celeriac or root celery

Calendula

Artful watering!
A look at the thyme bed

Sunday, August 3, 2014

Recipe - Zucchini Oatmeal Bread

With six Zucchini sitting on the counter I knew I needed to do something to use them up so I decided on Zucchini bread.  It is a quick and tasty way to use zucchini and its easy too.  I have collected many recipes and tried out three, the best we made more of.  This recipes caught my eye because of the oats which would give it more substance and make it a good bread to freeze.


I made six loaves of this recipe along with two loaves each of two other recipes.  All were tasty and perfect with a bit of butter and glass of lemonade.  This version was our favorite however, so I decided to share it with you.  I have several other recipes for zucchini bread yet to try and since I made 10 loaves and only used 4 zucchini we still have plenty left to experiment with.

Zucchini Oatmeal Bread

3 eggs
2 cups sugar
1 cup vegetable or canola oil
1 Tbls.Vanilla extract
1 cup quick Rolled Oats
2 cups flour
¼ tsp. baking powder
1 tsp. baking soda
1 tsp. salt
2 cups grated zucchini
1 cup chopped nuts (optional)

Beat eggs and sugar. Add oil and vanilla. Mix in oats, flour, baking soda, salt and baking powder. Add zucchini and nuts. Mix well. Pour into two greased and floured 8 x 4 loaf pans.  Bake at 350 for 1 hour.

Two quick full-sized loaves