Showing posts with label planting. Show all posts

Thursday, June 11, 2015

Garden Addition - Another Community

We ran out of room in our Elmhurst Community Patch and after visiting the Community Garden Fest in Berkeley I decided to get a patch there.  The patches are smaller 5 feet by 15 feet and cost less, but the community feel is much larger.  I will share some details of the garden in future posts or you can check out the Garden Fest Post.

I was able to plant the garden on Thursday, June 11 around 4:30.  We went over on Sunday, but the rain the day before made it too muddy, so we did not want to risk compacting the soil. Today we are going to have more heavy rain, so after work I hurried over with a selection of plants and got them into the ground.  When it rains later they will get a nice drink and hopefully will not be beaten into the ground.

not planted

My patch is on the end of a section with about 7 other patches going off to the left.  The water at this location is in rain barrels and I believe the Village of Berkeley takes care of filling them when it doesn't rain.

planted

I did not have room for the three dahlias I got from the Garden Club and last year they did not bloom due to competition, so I brought those over and planted them at the south end of the garden.  I made two hills for squash, then I plated Kohlrabi, broccoli, and a few herbs.

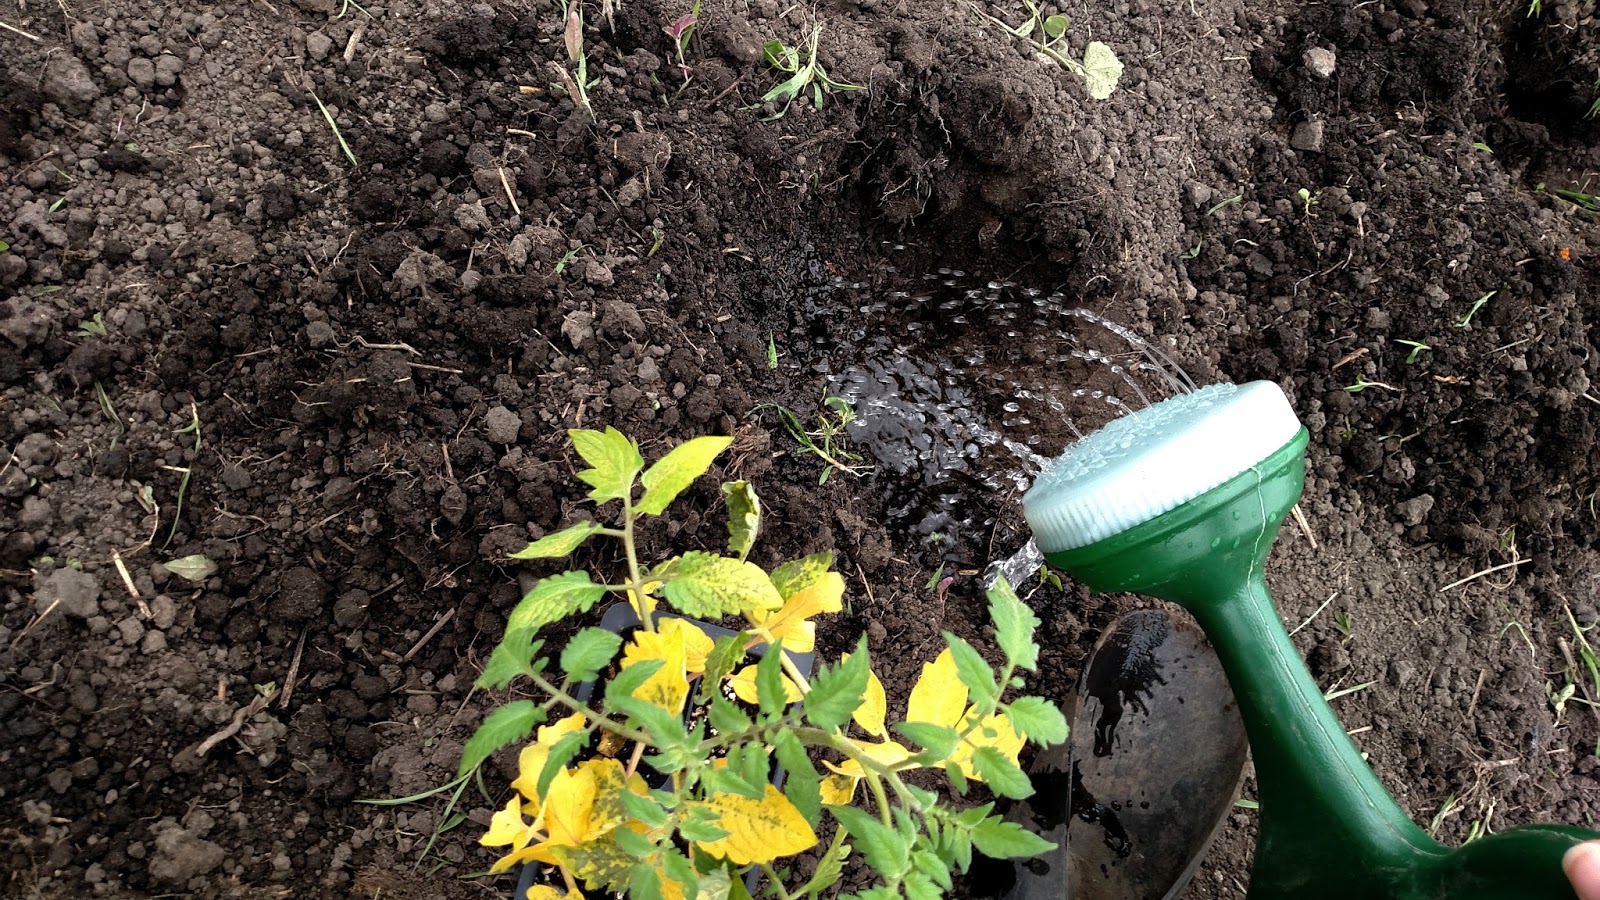
There is really no more room here, but I have one tomato plant left and I may bring that over to try and fit it in.


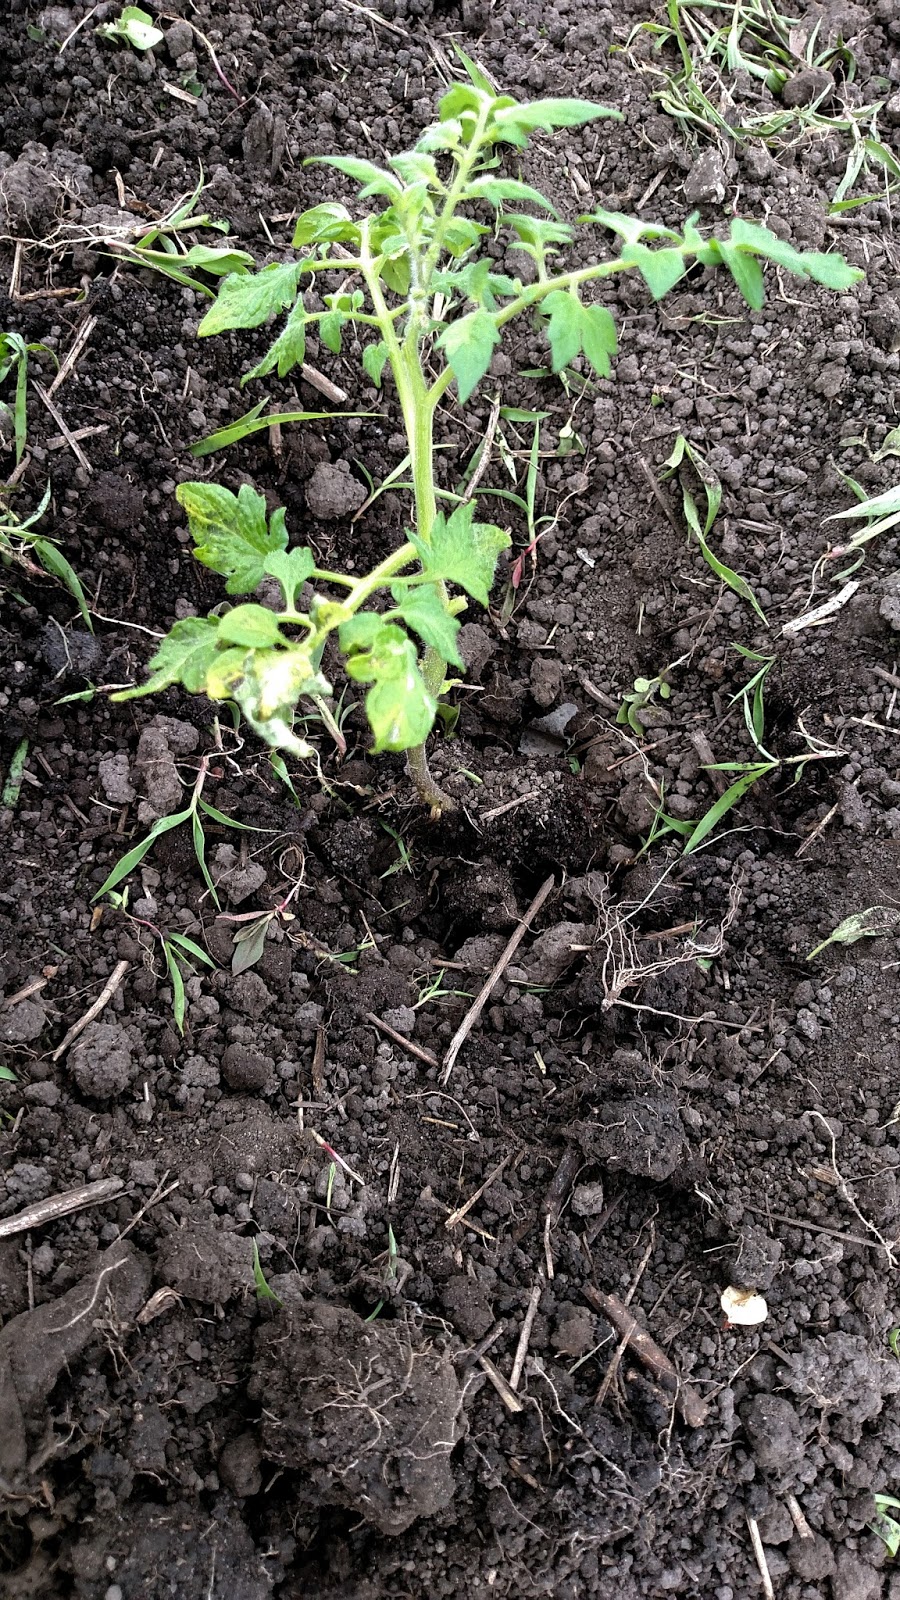
The soil has a good amount of compost and a nice dark richness, however there is a high concentration of clay.  You can see in the image of the soil by one of the holes for the kohlrabi.


Kohlrabi is a cool season plant and it may bee too late to get a good crop from it as the days have turned rather hot, but I think they will be okay until July and we will see about harvesting the roots (like a turnip) and maybe also the leaves for a salad.


Here are the dahlias, three different varieties three different colors, but they are pinkish, I think.  I have the names but will have to look them up again to know for certain.


I planted an oregano, a common sage, some chives and flat leaf parsley.  I just could not have a garden with no herbs in it, so I chose a few duplicates.

Chives                                                   Oregano                                               Parsley                              
My only fear is that as I pulled up to plant there was a bunny running through the yard toward the back, so I may lose the parsley.

It will be interesting to see how this garden fares versus the one in Elmhurst.  I will continue to post a weekly update and if I need to another day of the week to update the second garden.  However, the second garden is between the Elmhurst garden and my apartment, so I can stop at both on the same day with out too much trouble.

Thursday, June 4, 2015

Planting Tomatoes and Peppers

We used the same method for planting both the tomatoes and peppers. We did not grow the plants from seed, rather we bought seedlings at a plant sale at the beginning of May.  As someone who lives in an apartment I do not start plants from seed indoors.

The Technique

The best way to plant vegetables is first to lay them out with the proper spacing.  Tomatoes need between 18 ans 24 inches of space.  Peppers need only 18 to 20 inches of space around the plants.


A hole is dug twice as large and twice as deep as the root ball of the plant.  I fill the hole with water and allow it to percolate into the soil, This tells me if the soil drains well and also wets the soil so that the root is not dried out when buried.


Before placing the plant in the hole I toss in a handful of compost to give the plant a bit of a boost to off set the shock of being planted.  The finally the plant is placed in the hole and the soil firmed around the plant.  It is then water thoroughly.


Once all the plants were planted I gave them a top dressing of more compost.


We could have waited a couple of weeks to put up the cages, as the plants hardly need them now, but we decided to just stake and cage them now in case we had warm nights that would cause rapid growth.


We would have watered them one more time before leaving the garden, but rain was predicted that night so we did not.  Good thing, as it rained for several hours that night.

Friday, May 23, 2014

How to plant nursery plants

Most of the plants I placed in the garden came from a nursery.  I also have some winter sown seedlings that I will plant next week so i will talk about those then.  I also am going to grow some plants from seed.  That discussion will be in a day or so.

For today we are going to talk about how to give a nursery plant a good home so it will thrive in your garden.


These are the plants.  I obtained them from four places.  A couple I acquired at the Home Depot.  These are in peat pots from Bonny Plants.  I got basil and lemon balm on a whim when i was searching for a new patio pot.  Most came from the Herb and scented plant sale at the Oak Park Conservatory.  The Herb sale is their big fund raiser, although they do not have many herbs anymore I still support the sale and there are a few items you can only get there which I return each year for.  Several of my tomato plants, a few herbs and the cucumbers all came from the Conservatory.  I stopped at the Good Earth Nursery on my way home from the herb sale and got a few heirloom tomatoes, root celery, and a couple more herbs plants.  Luurs Garden Shoppe, which is my local nursery, less than two miles from the apartment is where I always get my potting soil, compost and other supplies like that, I picked up several thyme plants from them.  They stock an amazing selection of perennials and I cannot wait to shop there when I finally move out of the apartment!  I also won 4 broccoli plants at the garden club meeting in April.

So first things first.  The soil must be ready to be worked.

I laid out the garden with the plants still in their pots to make sure there was space.  I referred to notes, plant stakes and my own research to determine plant spacing.  Once I knew where I was placing the plants then I could dig holes.  Never take the plants out of the pots and leave them laying on the ground with bare roots.  They will dry out so quickly in the sun and the stress to the plant can be catastrophic.  All plants suffer from transplant shock adding dry roots to that and you can kill some less hardy plants.


Using a trowel or shovel, I like a hand shovel, dig a hole that is twice the size of the root ball of the plant you are planting..  This is my ergonomic shovel and I can dig with this all day without straining my wrist.  I admit this is an older tool, I have had it for years using it in my herb garden.   Use a ruler to measure over from the center of the hole to make the next hole when planting multiple plants. 


Toss a handful of compost into the bottom of the hole and water the hole liberally. This is a pepper plant so I just added some mushroom compost.  Organic materials like peat moss, composted grass clippings or plant material would also be perfect.  You just want to give them a bit of a food boost.


Then plant the plant, firming the soil around the plant with your hands enough to keep the plant upright and  the soil from washing away from the plant when it rains or the plant is watered, but not so firm that you press out all the air pockets around the plant.  Remember plants breathe from the roots so spaces in the soil for air are needed. Water the plant well after planting, then move to the next plant.  This is a bush cucumber.  

I place the plant tags that came with the plants in the soil near them.  I will eventually replace these with a larger, easier-to-read tag, but for now, it will keep them identified and allow me to remember what is what.  If it did not have a nursery tag, I wrote the name of the plant on a Popsicle stick and put that in the ground instead.

I put a top dressing of peat moss around the plants as a first layer of mulch to help the soil hold moisture.  I may add more mulch later.  I am waiting to see how the soil sheds water and if I need mulch for weed control. There is a lot of "unknown" in a Community Garden the first year.  In your own yard you will have a better grasp of the soil needs and quirks.

That is it, there is no other technique needed to plant these vegetables and herbs.  Just keep in mind that certain plants, like squash, are grown in a hill rather than on flat ground.  You mound up the dirt and place the plant in the center of the hill or if growing from seed you place three seeds in a hill and thin to one plant once they germinate and grow.

Here are  three planted hills of Zucchini.  I am growing that from seed.

Next time I will demonstrate layering.
.

Thursday, May 22, 2014

Garden Planted!

I had a plan to plant on May 9.  Instead we had downpours that resulted in soil too wet to plant in.  Then I had to wait a week due to a turn in the weather.  I was finally able to plant on Sunday, May 18.  It was in the 80s that day, but had been cold and snowing just two days previous.  It was still a risk to put plants in the ground with our changeable weather, but I went ahead and planted plants and seeds in an all day marathon.

Time wise (so you can compare)  I was able to get the plants and seeds in the garden in about 3.5 hours.  I started around 10 am and worked until about 1:30 with a break for lunch around noon.  That included planting and watering.  I spent another hour on that day placing some peat moss around some of the plants and rewatering so that would not blow away.

I had to rake out the weeds that were sprouting int he space, but did not need to till the soil,m as the park district did that.

Here are some images of the work:


Plot #72 with a few planting areas marked with flour.
The final garden plan (as designed)  This is subject to change during planting, but I had a rough idea of what I wanted to do using this plan I created in advance.
Tools: shovel and rake; watering cans; hand tools including trowels, hand rake, and ruler; plant markers, clip board with plan; brown paper bag with seed packets; cooler with water and snacks.
The plants mixed in two flats and an extra two cardboard boxes
The first thing I did was mark the handle of my rake with markings ever two inches for 1 foot, then 6 and 12 inch increments after that.  Now I just lay it down on the ground and  can easily space plants.

You can see how close the RR tracks are!  This is before work began, nothing raked or placed.

After raking a good portion of the plot (20 feet by 20 feet) I then placed out the plants based on the plan to see if everything would fit as desired.
We have way more tomato plants that originally planned, so that changed the diagram.  We also put in a few more paths that I planned too to make it easier to get in and take photos for future blogs.

That portion int he middle which is not raked is for seeds I did not intend to plant on that day, so I chose not to rake it until I was finished planting the other areas.

Here is a sneak peak of the completed planting, I will provide details of the how we got to this point in another post.